My Gingery Lathe really needed some work in preparation for the Champlain Mini Maker Faire, and I’ll go over the upgrades / fixes in this post just to keep everyone on board with where the Lathe is at. I was planning on doing this work anyways, but the Faire really motivated me to get it all done.
Video going over Upgrades / Fixes:
Gingery Lathe Upgrades for the 2013 Champlain Mini Maker Faire
Chip Guard
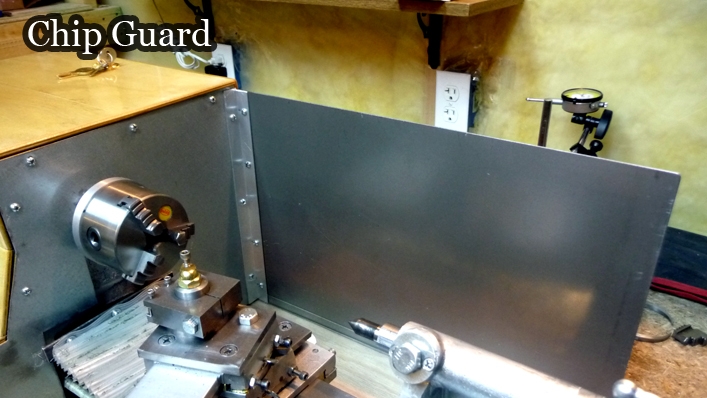
I really wanted to get a proper chip guard on the lathe, and it was the perfect time to get it done with all the other case related upgrades I was doing. I believe I used 16 gauge steel sheet metal from the local hardware store for this, and also some galvanized sheet for the section behind the chuck. Everything is bolted together with angle aluminum extrusions.
Handwheel Upgrades
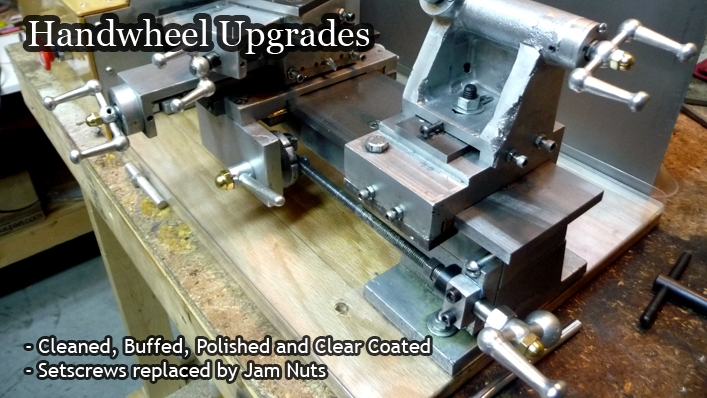
I’ve been meaning to update the handwheels on the machine for a while, primarily cleaning, buffing and clear coating them such that I would no longer feel the need to wear nitrile gloves to keep my hands clean ( from the bare aluminum ). I finally purchased a buffing wheel and mounted it on my bench grinder. What a dream it was to give the handwheels a proper cleaning. I think in the end I applied 10 coats of clear enamel which seems to be holding up quite well.
I also decided to replace the setscrew mounts with jam nuts. This allows me to use threaded rod for the feed screws ( better than the ones I hand threaded ), and I no longer have any slipping – though that could have been avoided by filing flats on the feedscrews. At any rate the gold acorn nuts really make the machine look nice.
Tailstock Upgrades

For the longest time now a good majority of the threads in the Tailstock Clamping Boss were stripped making it rather tricky to clamp the Tailstock Ram. As a fix I monted a fairly large fender washer to the face of the boss. I enlarged the two holes for a larger clamping bolt, and tapped both in place to ensure that the threads would line up properly. This update has worked out quite well, and I no longer have any clamping issues.
I also replaced the end cap with a new one that contained a ball bearing. The new end cap is a two pieces that when closed sandwich the ball bearing inside. The feed screw is secured to the ball bearing with jam nuts. This setup has worked quite well, and the ram feedscrew is so much smoother when turned.
Case Upgrades
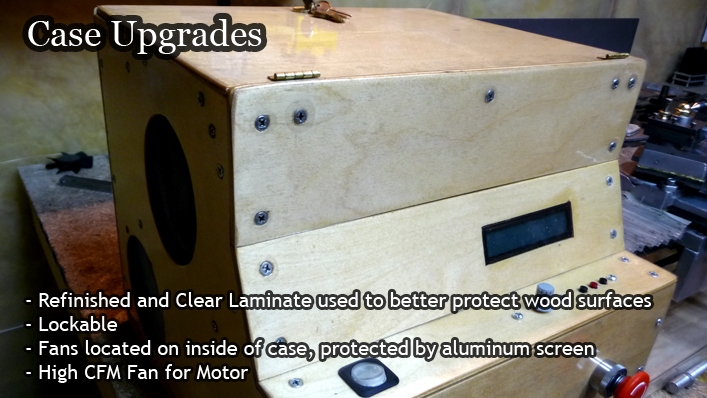
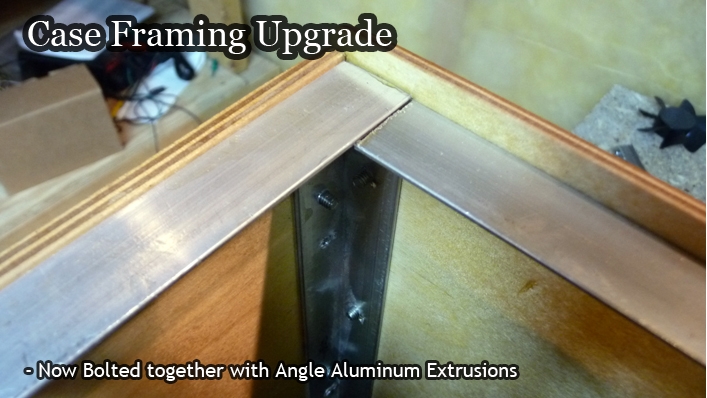
One of the main fixes to the machine before the Faire was to clean up and upgrade the case. Some of the panels were replaced, while others simply refinished. Quite a few coats of polyurethane were applied, and then a clear laminate was also applied to the outside surfaces of the case in order to allow me to easily clean it off moving forward with a rag and some water.Being that the lathe would be around many people at the Faire it seemed like a good opportunity to add a lock to the case such that people couldn’t get access to the electronics, pulleys, etc… when I wasn’t manning my table. Overall the lock was a nice addition.I also added a large fan which blows air directly onto the treadmill motor keeping it much cooler than before. The fans are now mounted inside the case and protected from the outside of the case with aluminum screening.Finally, the original case was joined with pieces of wood and wood screws which was not ideal. All of that has been replaced by an bolts and angle aluminum extrusions making it much stronger. I can also later swap out the wood panels for metal if need be.
Countershaft
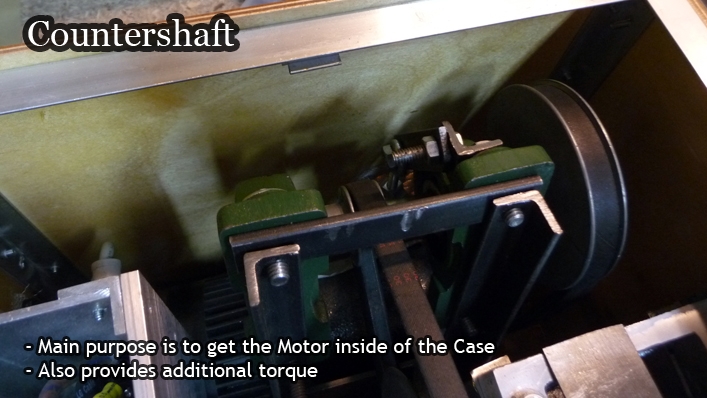
The main motivation for adding a countershaft was to move the fairly large motor to the inside of the case. Being that I had limited space, I needed to flip the motor around. This update has been nice three fold as the case dampens down the sound of the motor a bit, the additional pulley reduction adds torque, and being that the motor is now fully enclosed, it will no longer be exposed to metal chips, etc…
The countershaft itself is composed of steel angle, a large 4″ steel door hinge, self aligning pillow block bearings, 1/4″ bolts, and a tensioner. At some point I would like to replace this whole setup with something cast, but at this point it is working fairly well. The belt between the countershaft and the spindle is tightened at the back side via an eye bolt tensioner.
Spindle Bearing Oilers

The final upgrade to the machine was to add some oilers to the headstock to better keep the spindle bearings oiled at all times. I would find that I would have to frequently squeeze oil into the holes in the headstock to keep the bearings well oiled. I not only had to do this frequently, but it would also get oil all over the top of the headstock and close to the tachometer electronics. It clearly made sense to add these oilers such that I wouldn’t have to do this as much.
the oilers themselves are turned down from a casting’s sprue. The outside diameter is set to the inside diameter of a lip balm cover. Lip balm covers make the perfect caps for these. The headstock holes for oiling the bearings were tapped to 5/8″-16, and the oilers in turn threaded to 5/8″-16.
Future Upgrades
At this point I’ve been working on a software upgrade to allow for the indexing of the Spindle. It is working quite well, and I’ve been able to accurately rotate the spindle 96 steps ( 360 degrees ) multiple times, hitting the same mark each time. The nice thing about this upgrade is it is mainly software, and the encoder wheel is used to the do the indexing. One could easily swap out the encoder wheel to get different divisions, etc…
Probably in a few weeks I’ll have the software upgrade out, and downloadable. I do need to design a spindle lock for the lathe before this feature is really usable, otherwise any work done could potentially cause the spindle to rotate, which would ruin any accuracy attained. I’ll most likely cast something for the lock, though I’m still trying to think of the best way to set it up.
Cheers,
Morgan
Looks great Morgan- Was your tailstock lost-foam or greensand cast?
Hey Kerri,
Thanks for the comment. All of the parts on the lathe were cast using the greensand casting method. I just got into lost foam when I put together my paint can furnace, after all the major parts for the lathe were already cast. Moving forward if I was to make another tailstock I probably would attempt it using lost foam. I do want to make a dremel holder for my QCTP so that, or a spindle lock, may be the next items cast using lost foam.
Cheers,
Morgan
Hi Morgan. My compliments for the lathe. it come out great ! love your videos and many details of your workshop. I intend to make one. I observed many videos of lathes and i will have many improvements
I have a questions about the circuit board.
How did you put it together, meanning, what kind of board (arduino?) what else you did to place it well? does it let you to make different tipes of threads ?
I’d like to see the end of the worm screw of the bench carriage ….
please, let me know
from the Sardinia island, italy … bye