I really wanted to get into hobby robotics, however it quickly became apparent that I would need some machine tools to build the parts for the robots. Instead of buying a cheap lathe, I began researching some possible ways of building one from scratch. I initially happened upon a ‘Fonly Lathe’ which means ‘If Only I Had A.. Lathe’ design which was made out of wood. This really didn’t seem like it would fit my needs, I was hoping for something along the lines of one of those hobby 7×12 lathes. I ended up finding a great series of books by Dave Gingery that seemed to be a great fit – small benchtop lathe made out of metal, from scratch without the need for a machine shop.
The first step toward building the lathe was to gain some capacity to melt and pour aluminum. I started off with book #1, and got to work on my foundry.
*note: There is an awesome community of people who have built ( and are currently building ) the Gingery Machine Tools on Yahoo Groups. If you are interested checkout the group here: Gingery Machines Yahoo Group »
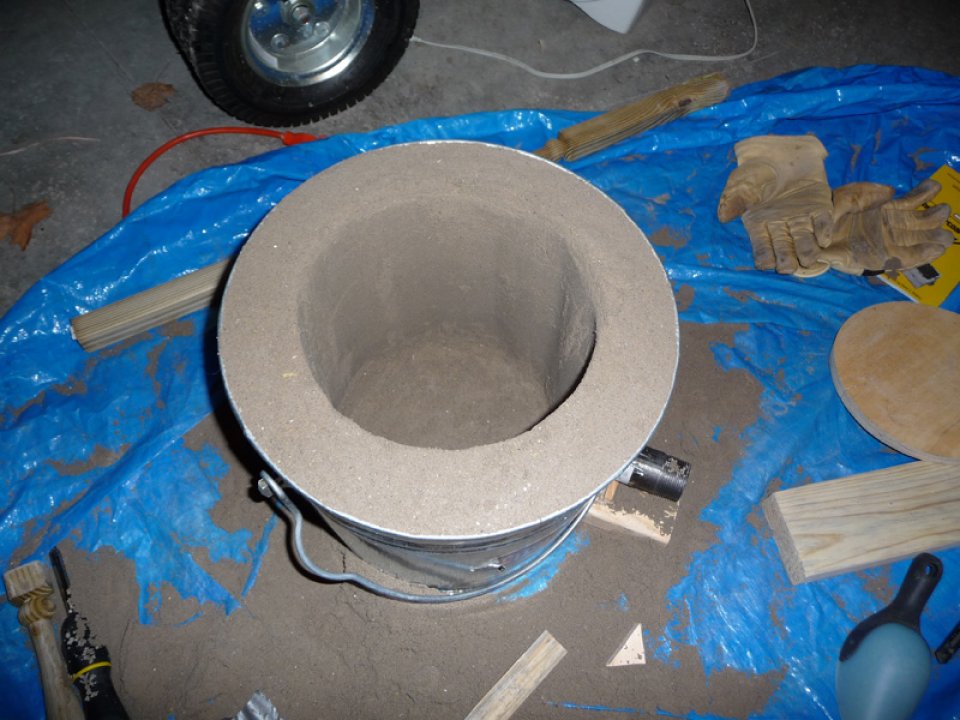
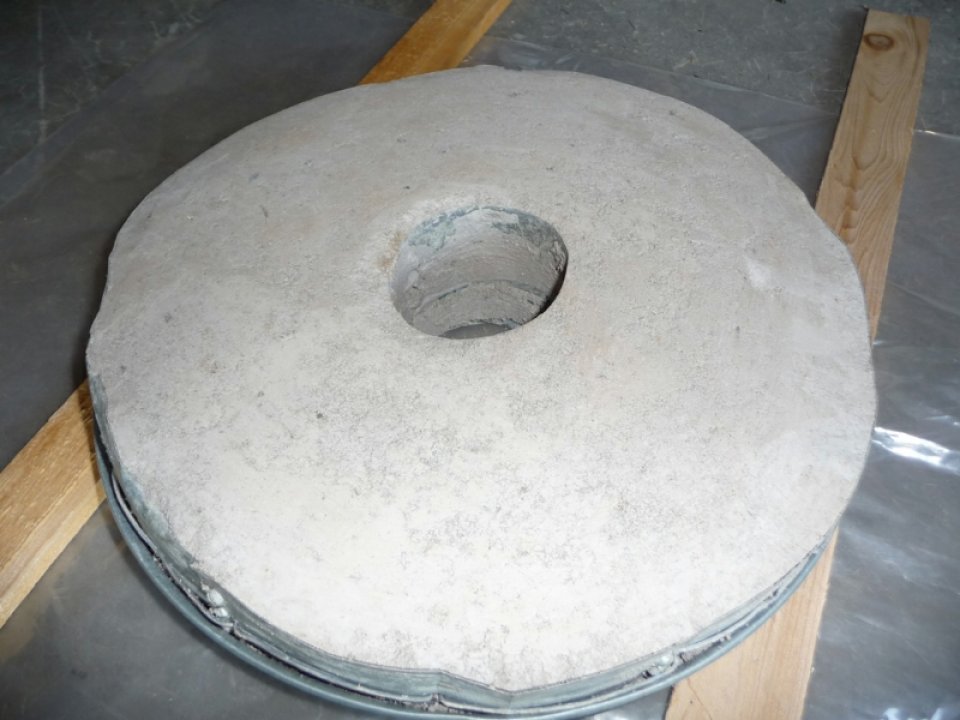
I built the initial blast furnace roughly on what was discussed in the first book, though I did try and make it a bit bigger to facilitate a 1.5qt cast iron pot ( which I was planning on using to melt the metal in ). Gingery suggests building a charcoal powered blast furnace, though everything I was reading was suggesting that it would get old fast, and propane was the way to go. I ended up baking the refractory lining with charcoal, but quickly converted the furnace to propane before actually melting any metal. I ended up baking the furnace lid in our stove – the homebrew refractory mixture contained nothing toxic, and it really didn’t smell that bad.
Photos of the Charcoal Furnace:


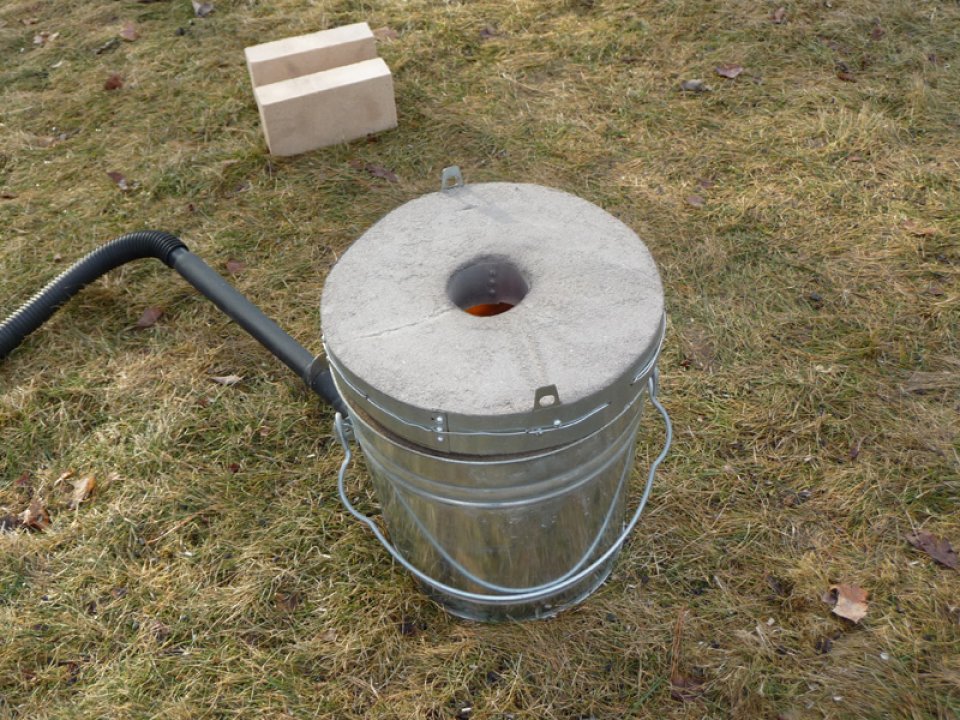
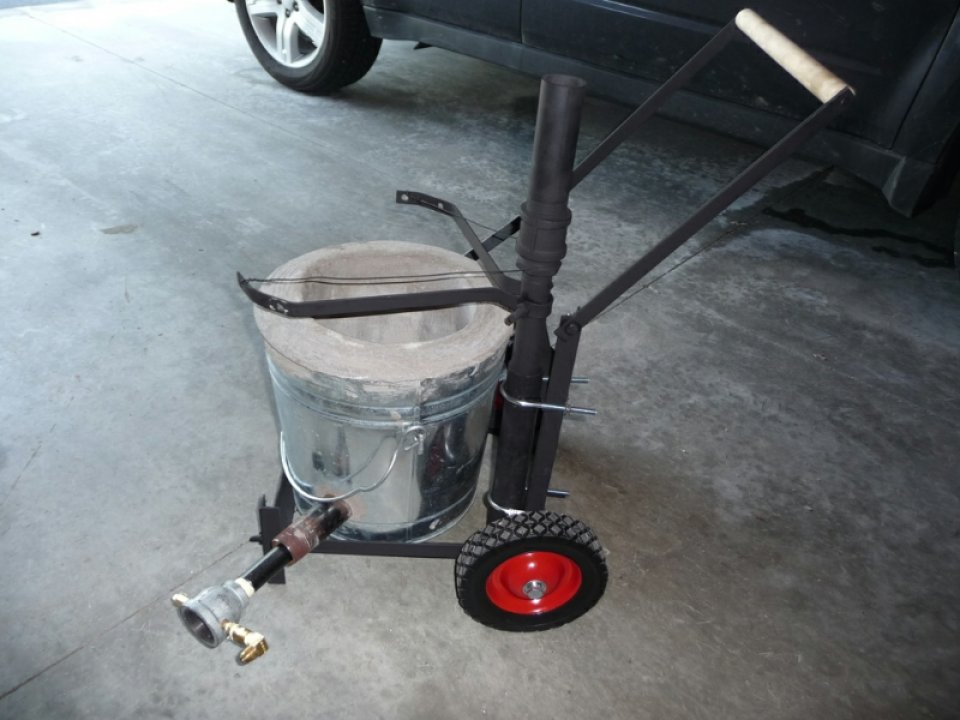
I really needed to get the furnace on a cart to make getting it in and out of the garage much easier. At first I had two ears on the lid with which I would run a steel bar through to lift the lid off and on ( which became a pain ). The cart that I built made it easy to move the furnace ( less stress on the lining from lifting it over and over again ), and also integrated a quick and easy lift and turn mechanism for getting the lid on and off.
Photos of the Furnace Upgraded to Propane on Cart:

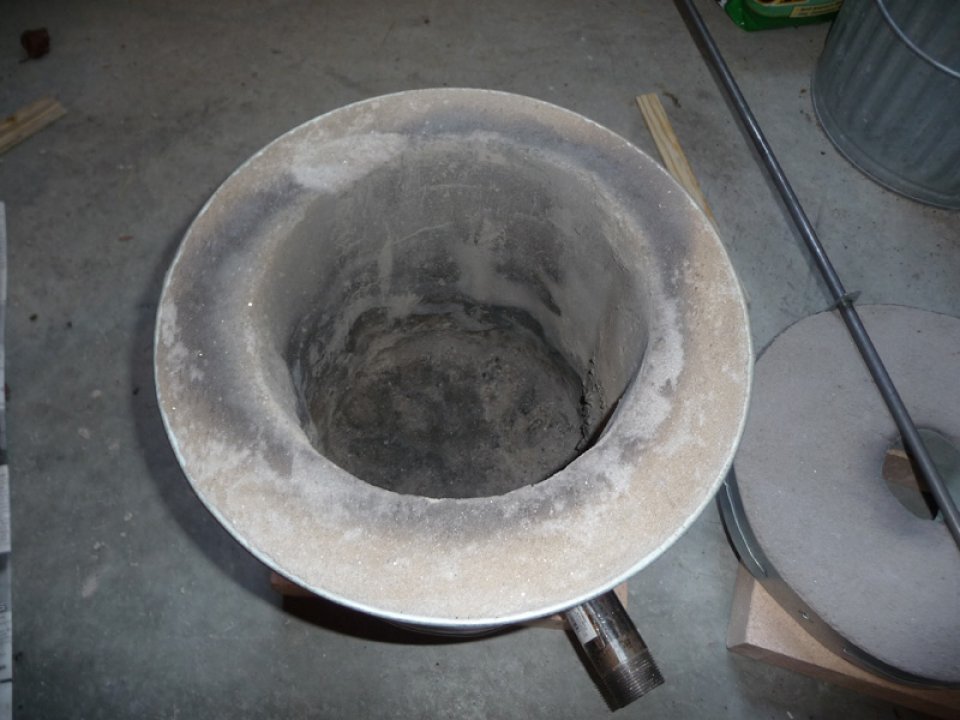
Once the furnace was done, on a cart, and converted to propane it was time to start putting together the additional tools needed to ram up patterns in a green sand mold, pour the metal safely, etc…
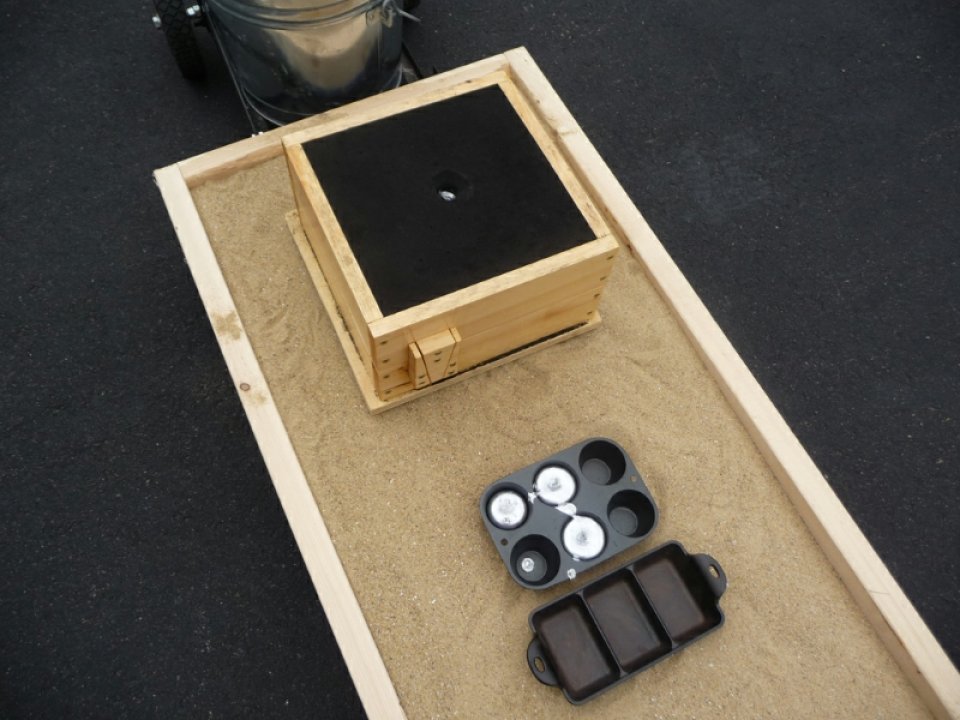
I built the suggested ‘Molding Bench’ from book #1, and it has proved to be a great asset. It is really helpful to have an area that contains all the sand when ramming up the flasks, especially when doing it in the garage.
Molding Bench:
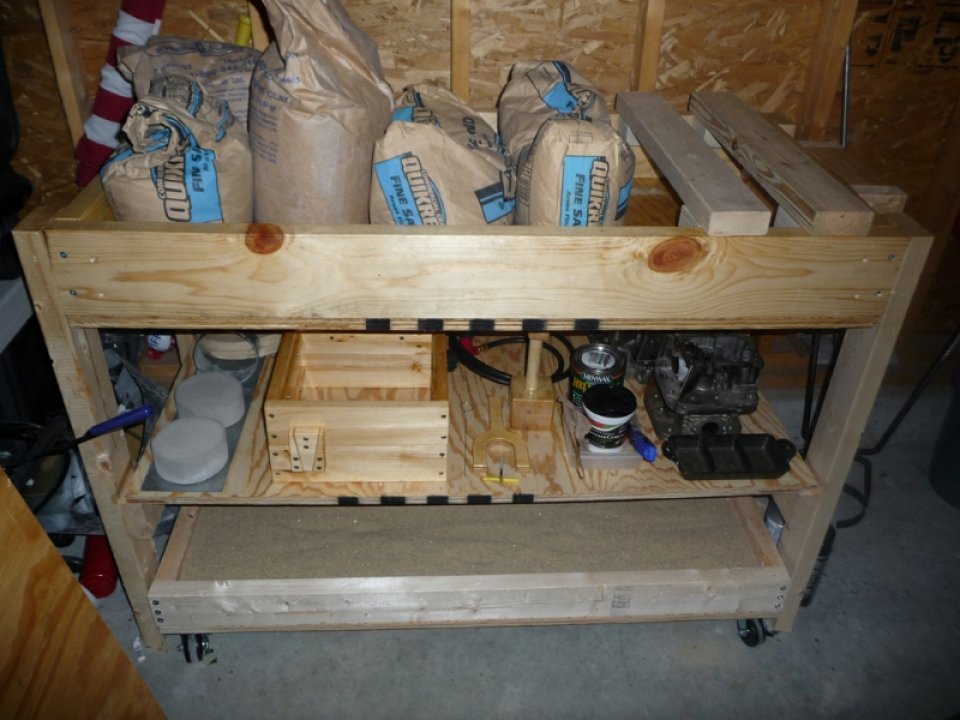
you can see under the bench there is a box on castors. When it’s time to pour some metal I roll that outside, take the top off and inside is nice bed of sand with which I pour over. If any of the molten aluminum happens to land outside of the flask, I know it won’t splatter back at me in any which way. Definitely always pour over sand.
What else do you need for molding?
a. Green Sand ( or Petrobond – oil bonded ) – Basically a water bonded sand and clay ( bentonite ) mixture. I had a really hard time finding fine mesh sand locally. I ended up reaching out to Vermont Castings, and the manager there ended up being great. He gave me a tour of their facility, and let me take some of their casting sand home to try out in my own foundry. Unfortunately the sand didn’t produce the results I was looking for, and was formulated for casting iron – not aluminum. I ended up purchasing 150 pounds of 100 mesh olivine sand, and southern bentonite from Lancaster Foundry Supply in PA. The order came to like $7 or something, but the shipping was like $40 - obviously due to the weight. Anyways, that being said my new sand was like gold to me, and the molding bench has helped me keep it all in one place. The sand was quite fine and I have gotten pretty good quality castings from it ( being a homebrew recipe ). I also like the fact that I can break up the cooked sand and add a bit more water in order to reuse it again and again and again.
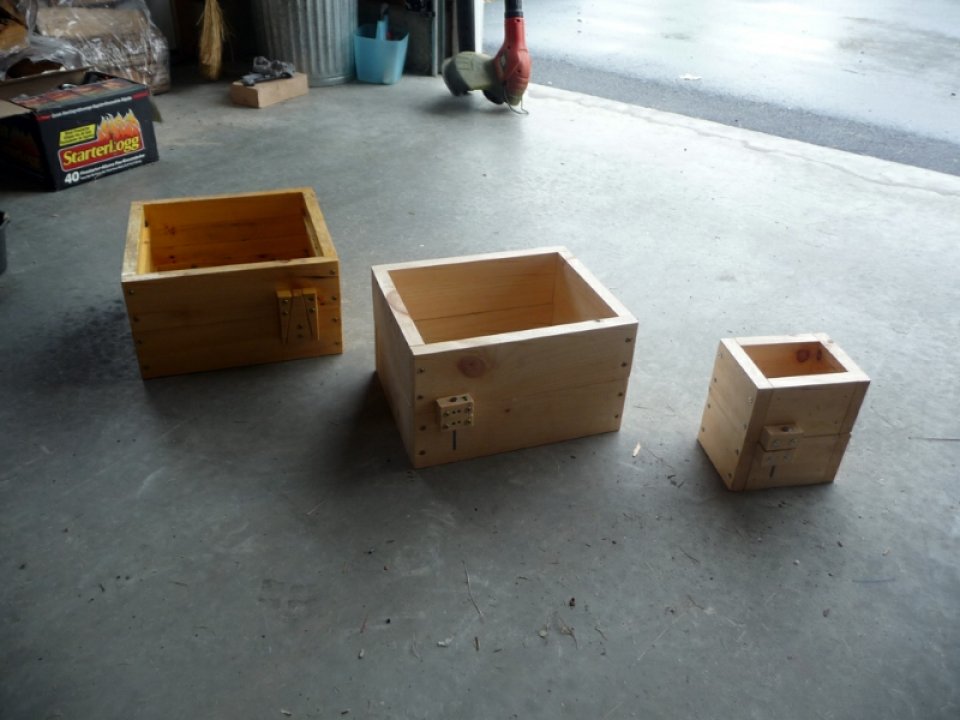
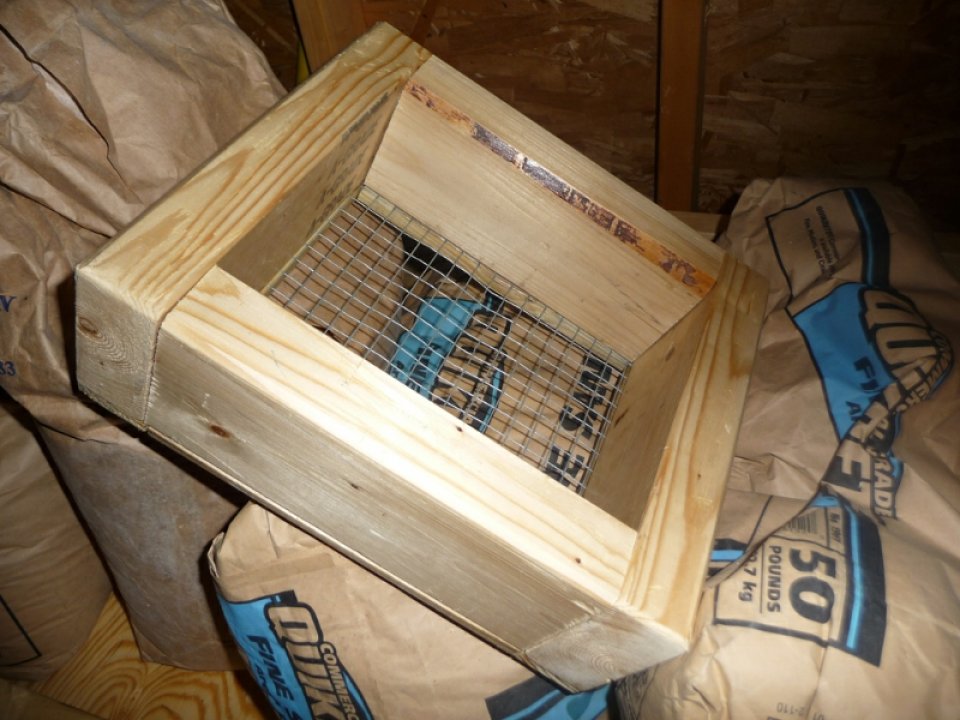
b. Flasks – 2 part wood forms that you ram the molding sand into. Setting the wood pattern somewhere along the parting line ( where the two halves of the flask meet ). The key to these is setting up alignment pins such that when the two halves are separated, they can be joined again in the same exact position as when they were separated. Also, you need molding boards for the flasks which aren’t in the photos. This helps contain the sand in the flask when rolling / flipping the flask over, and also provides a floor for the mold keeping it from falling out the bottom of the flask.
Photos of some flasks I’ve made:
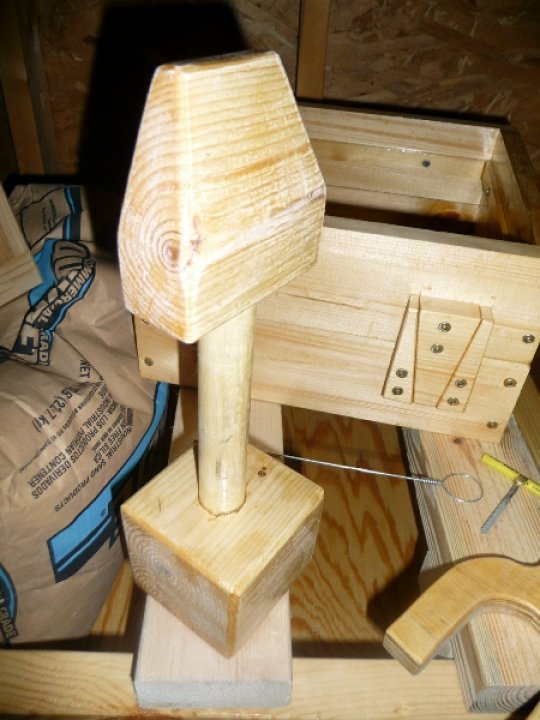
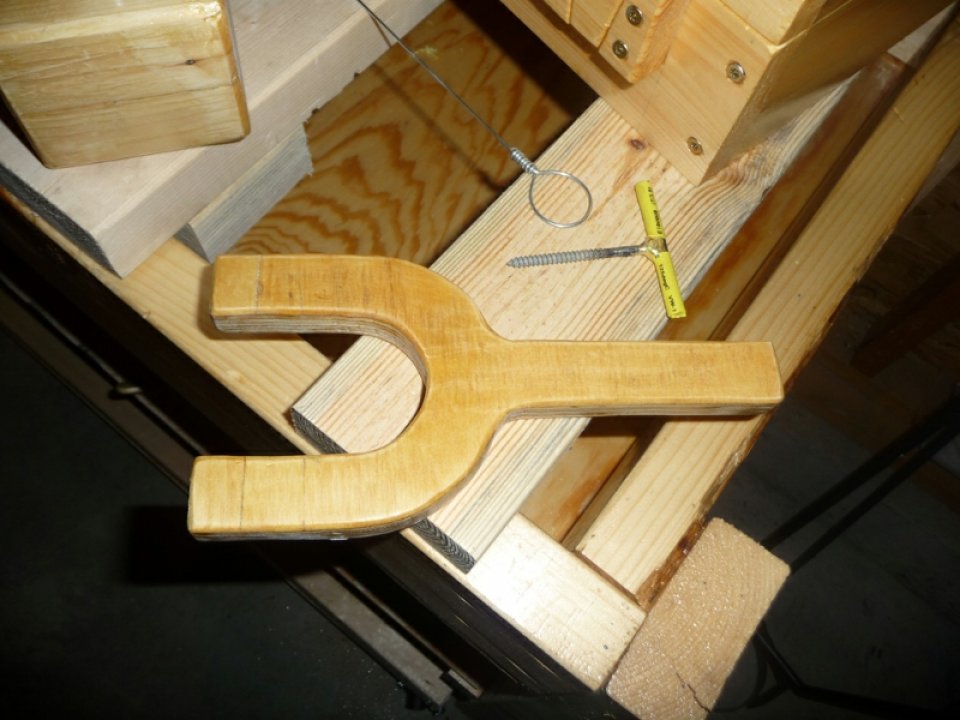
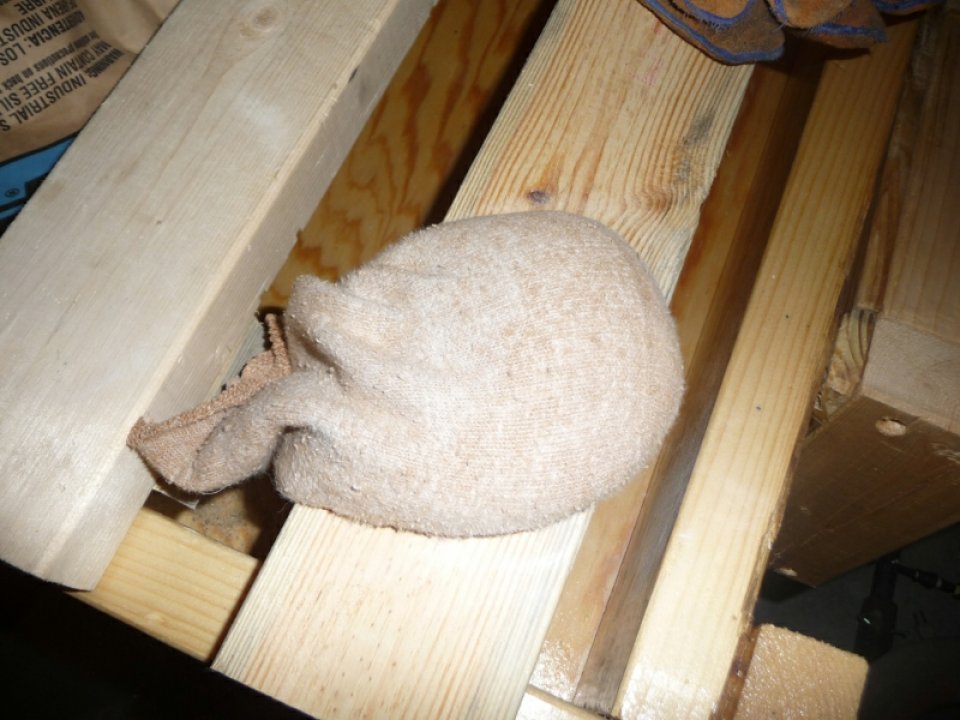
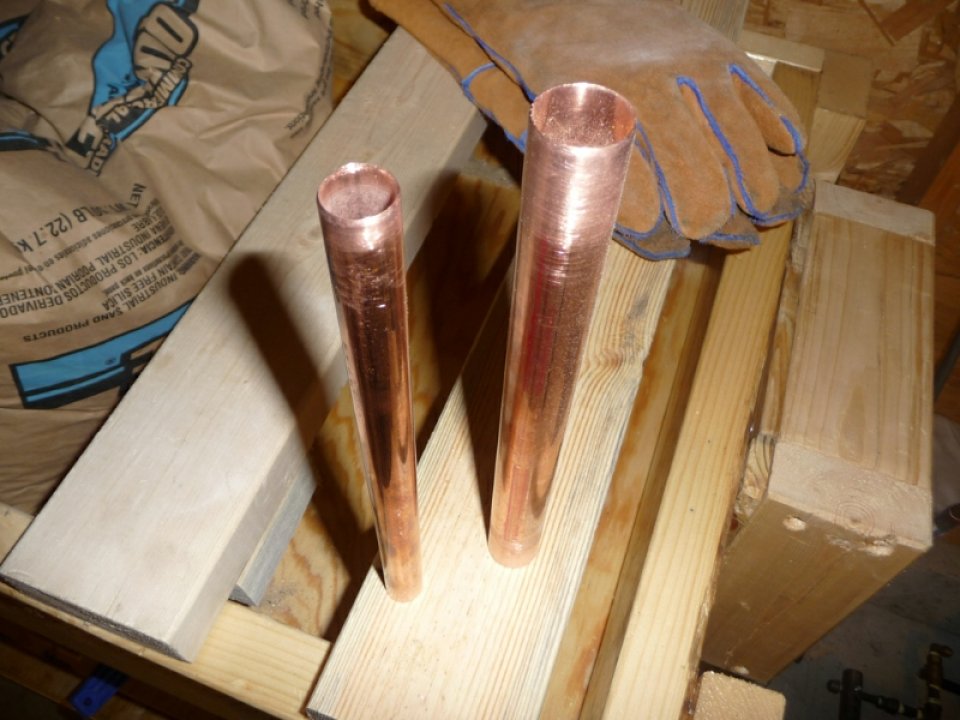
c. Molding Tools – I built the typical tools from the book – Rapper, Rammer, Vent Wire, Pattern Puller, Parting Dust Bag, Riddle, Sprue & Riser Cutters.
Photos of the molding tools:

To get a sand mold of a pattern, you basically take a flask of appropriate size. The pattern ( which can be made of whatever material, but typically would be wood ) is designed with a good amount of draft away from the parting line such that the pattern angles away from the parting line and has no sharp 90deg angles ( making it easier to extract the pattern from the sand ). The parting line is where the two halves of the flask meet. This is where you will be removing the pattern after you ram it up in the sand in the flask. There are many different techniques for setting up the mold, which all depends on the complexity of the pattern you are attempting to cast.
For a very simply pattern like this:

you would open the flask and place the drag ( bottom half of the flask ) upside down on a molding board. You would place the pattern on the board with the draft angle converging toward you as you look down on it. You then dust the surface all over with parting dust ( I simply use baby powder in an old sock which puts a nice thin layer of dust over the surface ). You then begin to place some sand over the pattern – I like to put the Riddle over the flask to ensure that only fine, broken up, sand lands on the pattern directly ( the riddle has a wire mesh ). Once the pattern is covered I will fill in the remaining layer ( typically I ram up a flask half in 3 layers ) and use the Rammer to ram up the first layer of sand. I then add the two additional layers ramming up each as I go. You then proceed to score off the sand that protrudes above the flask with a piece of steel bar stock or 1×2 wood board. I will then add a small dusting of sand to the top, and rub on a molding board. I’m now ready to flip the drag over – I hold both molding boards when doing this in order to prevent any stress on the molding sand that has been rammed up. Once flipped over, you remove the top molding board, and will see the pattern. You do not remove it at this point, instead you place the cope ( top half of the flask ) right side up on top of the drag, and then dust the top of the pattern with more parting dust. I like to determine where I will be placing my sprue and riser at this point, and mark off the area on the outside of the flask with some chalk. You then ram up 3 more layers of sand reaching the top of the cope, and then score off the excess from the top. Using the chalk marks you use the Copper Pipe sprue and riser cutters to cut both a sprue ( where you pour the molten metal, should be fairly big ) and a riser ( where the metal will flow once the pattern cavity is full, provides excess metal to the pattern as the metal cools and contracts – helps prevent voids from forming ). Make sure the sprue and risers are cut out below the parting line such that you can cut runners to the pattern. I’ll typically leave the sprue cutter in and form a funnel around it with a small spoon. Before removing the sprue cutter I’ll press down lightly on the funnel cut out in order to smooth the surface and reduce the chance of any loose sand falling into the hole or getting into the casting. Once the sprue and riser cutters are removed, I then will tap around the flask a bit to hopefully make it a bit easier to separate the two halves. I then proceed to separate the halves as carefully as possible as to not disturb anything inside ( lifting the cope as straight up as possible off the drag ). If all goes well, you will be seeing the pattern sitting there with two holes for the sprue and riser some place within close proximity. I then use a artists palette knife to carefully cut runners from the sprue hole to the pattern, and from the pattern to the riser. I then proceed to extract the pattern – it can be helpful to tap the pattern with a ‘Rapper’ and then use a ‘Pattern Extractor’ to remove the pattern from the mold. Once the pattern is removed check for any defects, some things can be repaired with the palette knife, but typically it is desired to have no defects present as any repair work is going to be weaker than the rammed up sand. Once the pattern has been removed I’ll use a hand bellows to blow off any loose sand from the cavity. I’ll then proceed to use the vent wire to create some vents from the cavity, pushing through from the inside to the outside. The vent wire is very thin and should not disturb the cavity much, other than putting very small pin holes to help gases escape. If everything looks good, I’ll carefully place the cope back on the drag. We are now ready to pour some metal ![]()
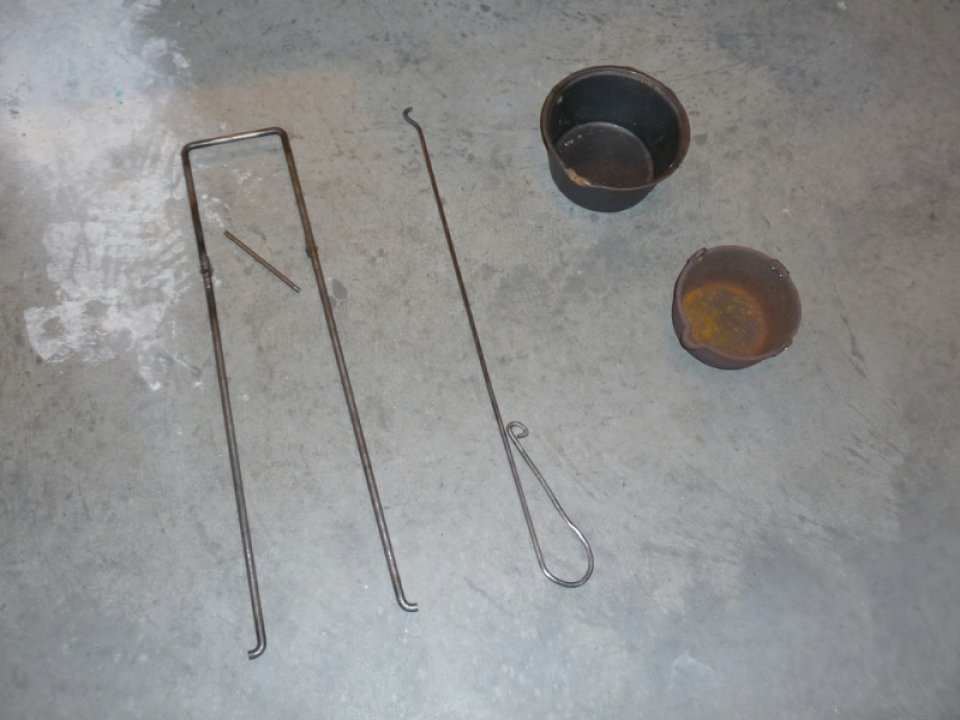
Before pouring any metal however you’ll need some casting tools in addition to the furnace and sandbox ( or bed of sand ) to pour over.
a. Ingot Molds – I like to use cast iron muffin tins, however you could fashion your own out of molding sand. To ensure that there is no moisture on the muffin tins ( steam is bad ) I’ll warm them up on the furnace.
Photos of muffin tin ingot molds:
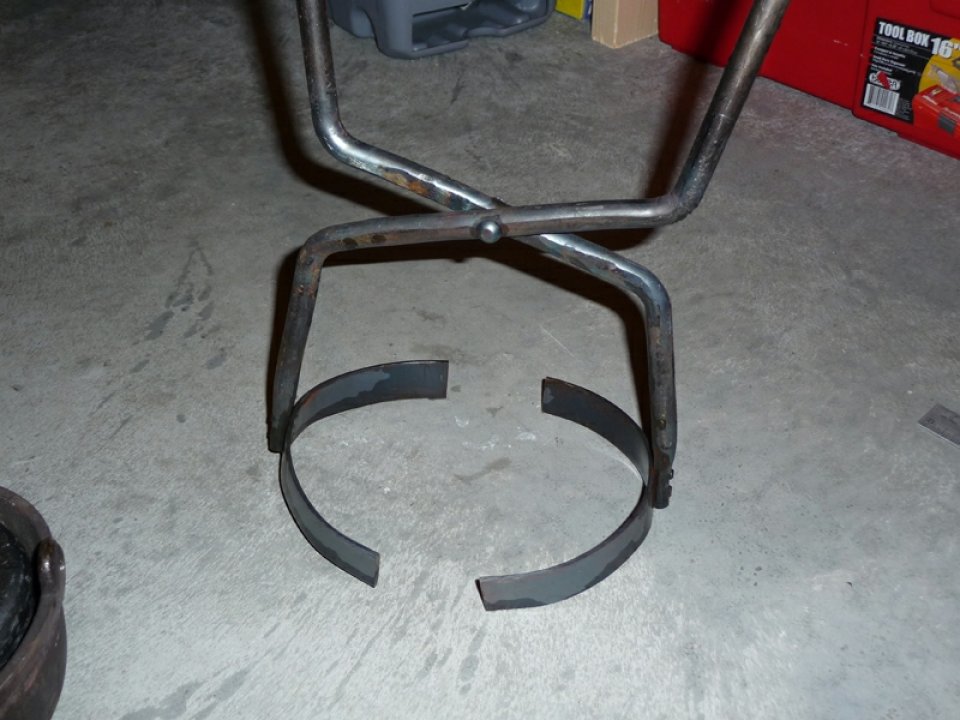
b. Lifting Tongs – I initially built a typical set of tongs from book #1, however I ended up not feeling comfortable using them and devised my own lift & pour system.
Photos of v1 lifting tongs:
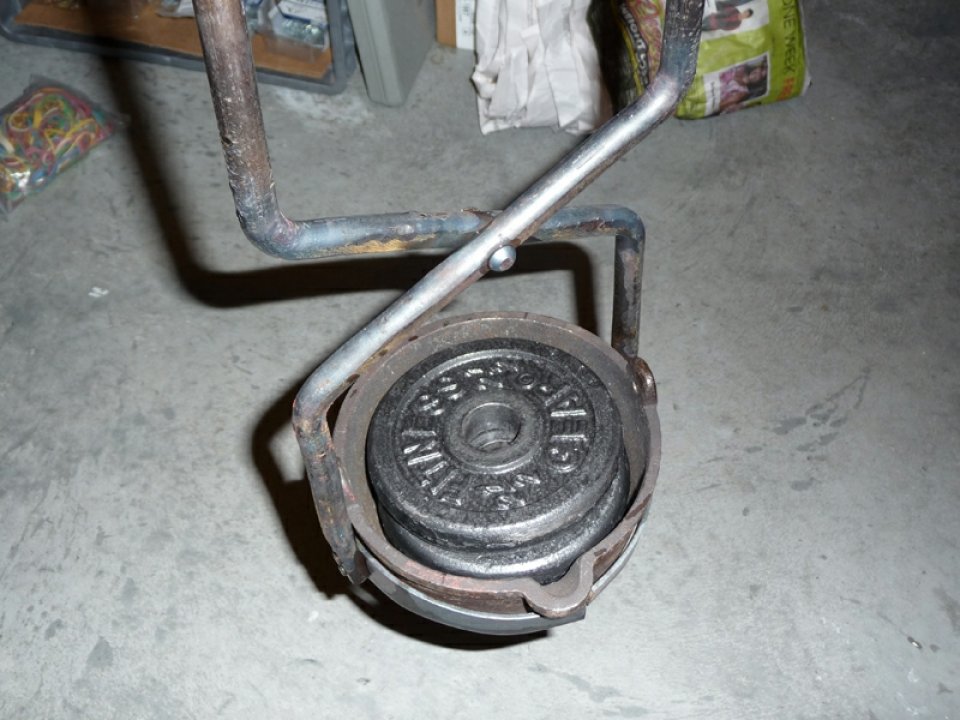
Photos of my Lift & Pour System which I’ve used for all my pours:
Video Of Me Demoing The Lift & Pour System »
Video Of Me Pouring Metal With This System »
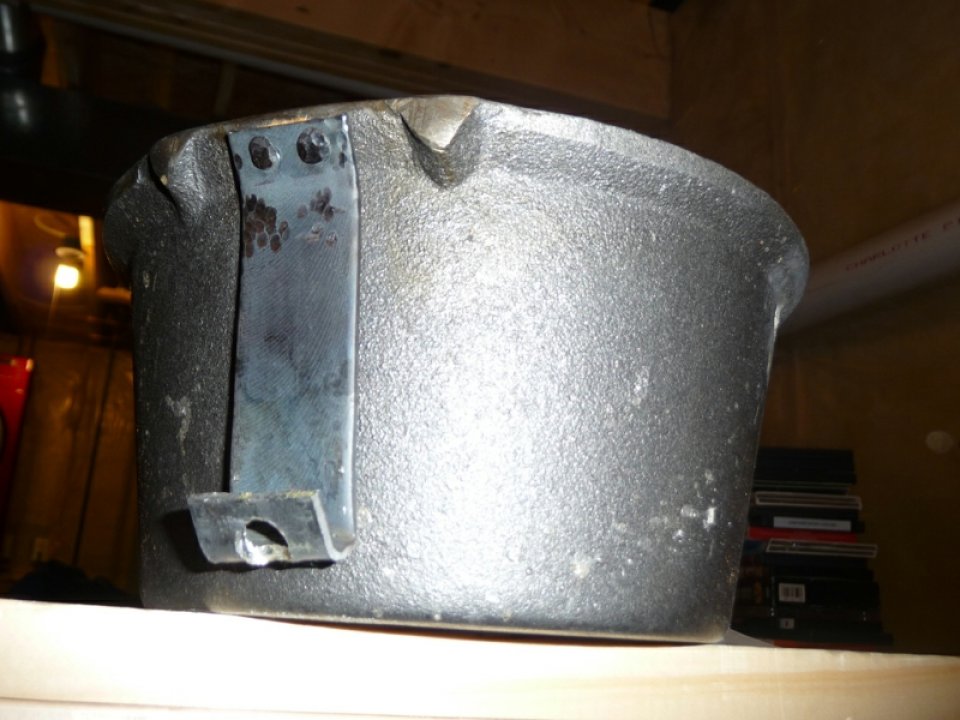
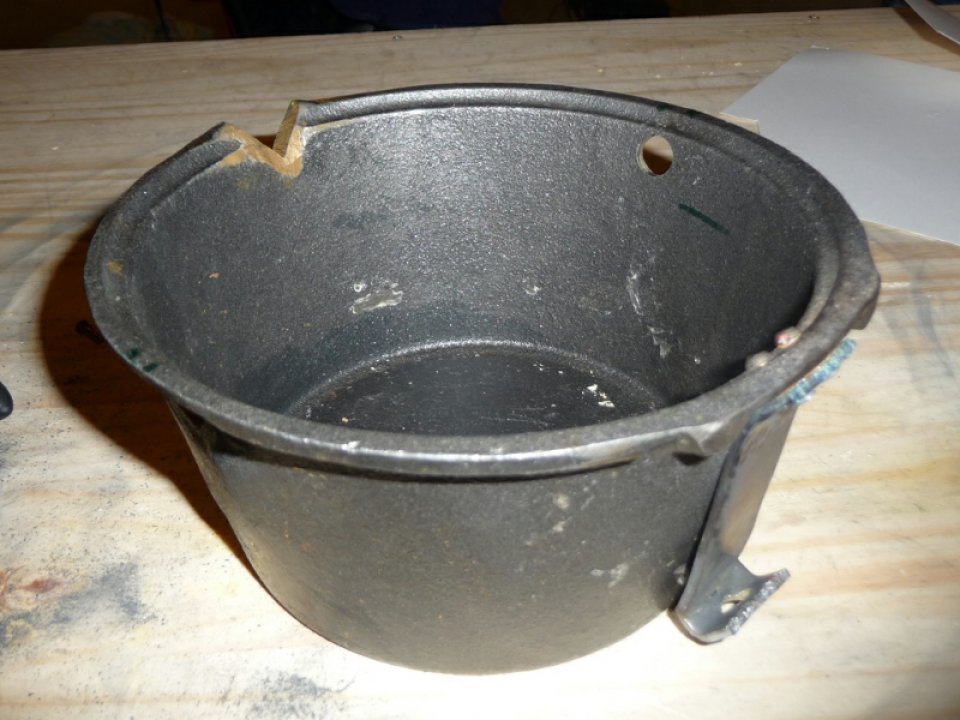
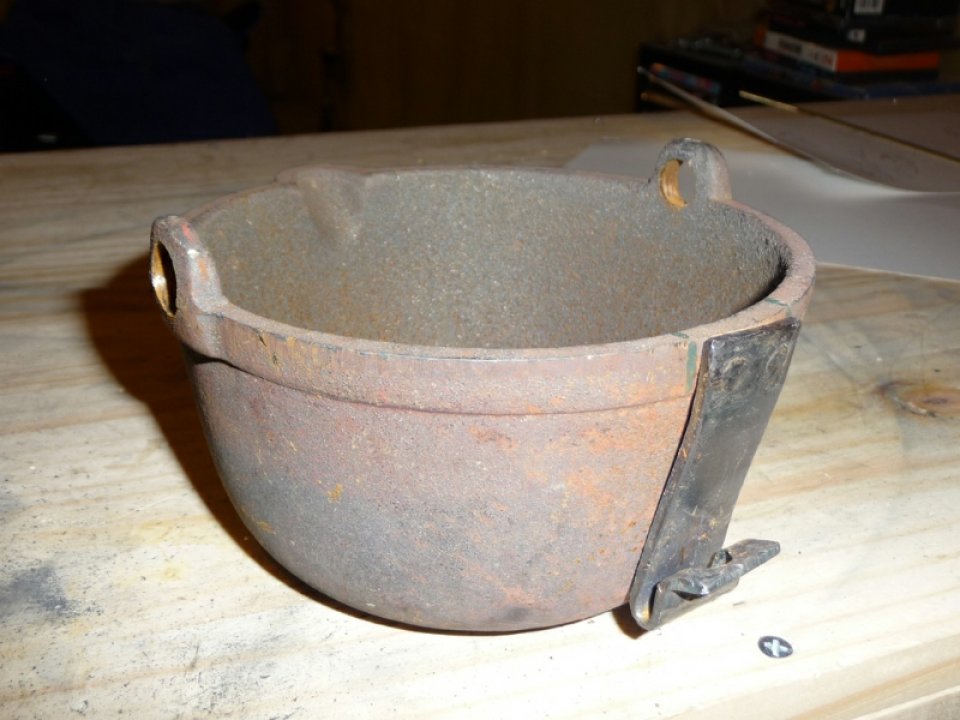
c. Melting Pots – I have used 1qt and 1.5qt cast iron pots quite successfully for all of my melts. I’ve read that the cast iron can add impurities to the castings, however I’m not doing this professionally and the results I’ve gotten have been more than adequate for what I’m doing.
Photos of my melting pots:
d. Slotted Spoon / Dross Skimmer – You’ll need something to scrape the junk off the top of the melt before you pour it into your mold. I built my own out of steel bar stock, but I’m sure you could get away with using a big slotted spoon with a really long handle, I just don’t like to get my hands that close to the heat…
e. Safety Gear – I use a nice leather apron, thick welding gloves, face mask, leather boot covers, and leather boots. I’m sure I could probably be even safer, but I feel fairly confident with the gear that I have been using.
f. Scrap Aluminum – For the lathe project I’ve been working on, re-casting cast aluminum scrap has worked out really well. I’ve been able to collect quite a bit from small engine repair shops in the area, and just recently my neighbor donated his old lawn mower to my cause ![]() I tend to have to cut down the metal to fit in my pots, which can be a pain.
I tend to have to cut down the metal to fit in my pots, which can be a pain.
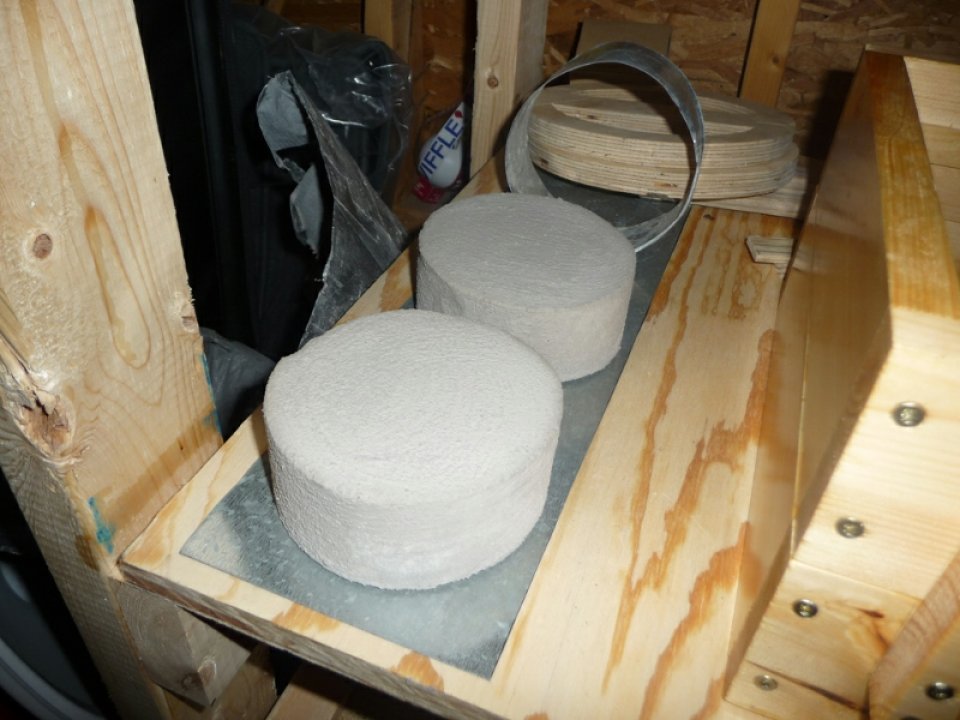
g. Plinth Blocks – These aren’t required, but keeps the melting pot off the bottom of the furnace and not in direct contact with the flame. I use the same refractory mixture that the furnace walls is made of, and bake them in the oven.
Photos of plinth blocks:
h. Canopy – If I know there are chances of rain, and this can be fairly common in Vermont, I’ll setup under a 10×10 canopy. This isn’t required but definitely adds some flexibility if the weather is not behaving.
Photo of a full setup ready to go:

So what now? I would fire up my furnace and load up the melting pot with some aluminum, put the lid on and put the ingot molds on top. I tend to run the propane at 15psi initially, and then will back it off to 10 psi after the furnace is warmed up. Every few minutes I’ll take a peak inside the furnace, with my face mask and other safety gear on, to check and see how the melt is going. Once it becomes apparent that the metal is starting to look gooey, I know I’m reaching the proper temps. Typically if the pieces in the pot are big, and a pool of molten metal is developing at the bottom of the pot, I’ll use my dross skimmer to lightly push the metal into the pool a bit, which seems to speed it up a little. Once there is a nice pool of liquid metal in the pot, I’ll run the dross skimmer once around the rim, and the bottom of the pot to make sure it is melted throughout. If it is fully liquid, I’ll skim off the junk at the top of the pot with the dross skimmer and tap it off into the sand. I then cover the melt for a few moments while I get ready for the pour – placing my lifting stuff in expected locations, etc… Once ready, I’ll open the top, hook onto the pot, remove the pot and step over to the flask to be poured ( try and limit the amount of walking you need to do while holding the pot of molten metal, I can simply side step once to get to where I need to be for the pour ). I’ll then use the pouring hook to grab the pour dongle on the pot and pour into the flask. I keep pouring as quickly and steadily as I can until I see metal mushroom out of the riser. If there is any metal left in the pot I proceed to pour it into the muffin tin ingot molds.
Click Here To See A Video Of Me Molding & Pouring A Pattern » ( in fast forward )
Cheers,
Morgan
hi morgan congratulate you for your achievements are quite amazing and my name is jorge constructive living in Colombia will have a lathe but do not own me Might buy the dinero.para send planes manufacture of what you’ve done. excuse abusing your knowledge greets you with much appreciation jorge