I’ve always been interested in woodworking though I’ve never had the tools or the space to do it really. Prior to moving into my house in VT, I think the last time I built something out of wood was in shop class in middle school ( do they still have shop class? ). For this post I’ll basically list some main areas and summarize the project. If you have any questions definitely post a comment.
Children’s Toys & Furniture:
There is nothing like giving your son something that you have made and telling him you made it for him. It puts a smile on my face every time I hear him talk about how ‘Daddy made this’ and ‘Daddy made that’.
Toddler Walker / Climber:
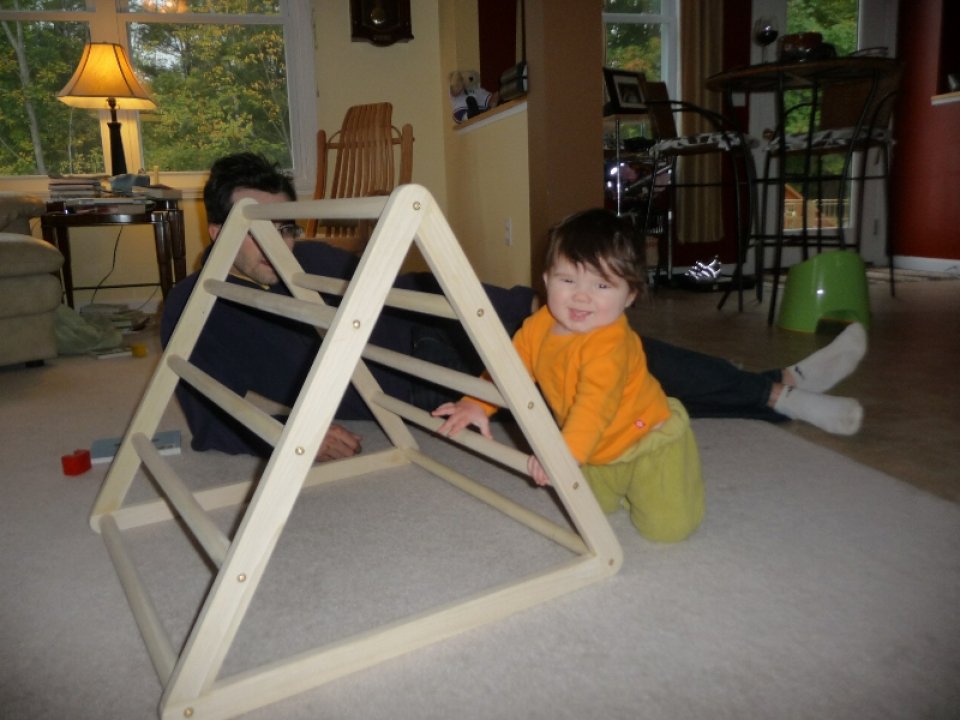
Materials: Poplar 1×2′s, Poplar 1/2″ Dowels, Brass Screws, Glue
Tools: Coping Saw, Miter Saw, Drill, Screwdriver, Tape Measure
Rowan was going to an infant / toddler class at the Lake Champlain Waldorf school, when they introduced something similar to another child in the class. It seemed like a great tool not only as a standing aid, but also for climbing and walking. My version worked out quite well, however I may remove the brass screws and glue in some oak dowels instead when our new baby is ready to use it. I’ve had great success using dowels and glue as a screw alternative – looks so much nicer too.
Maple Wood Animal Figures:
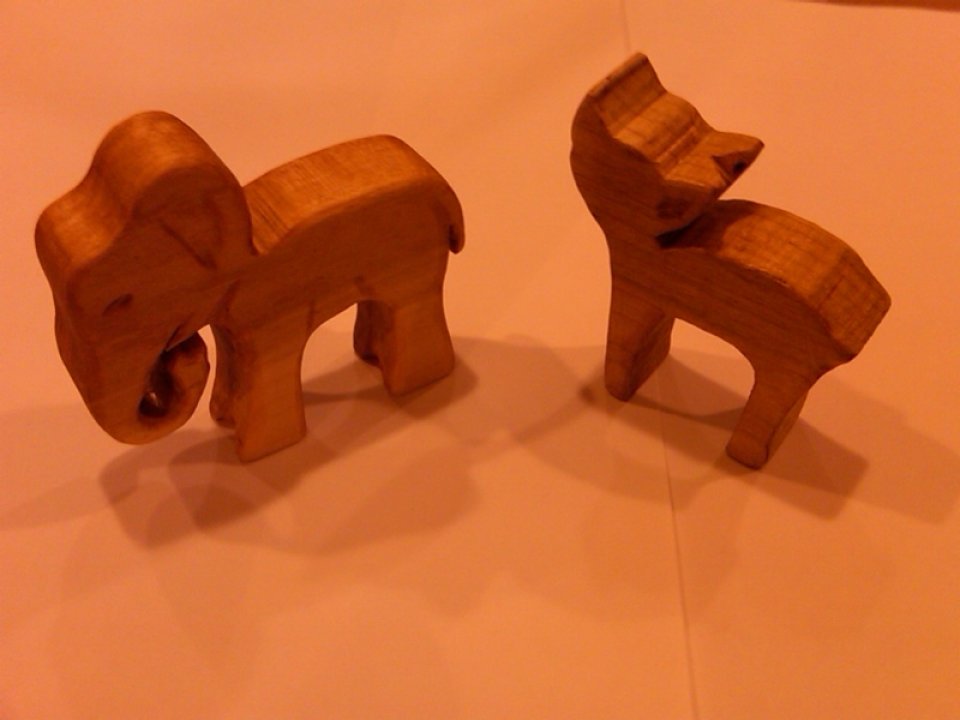
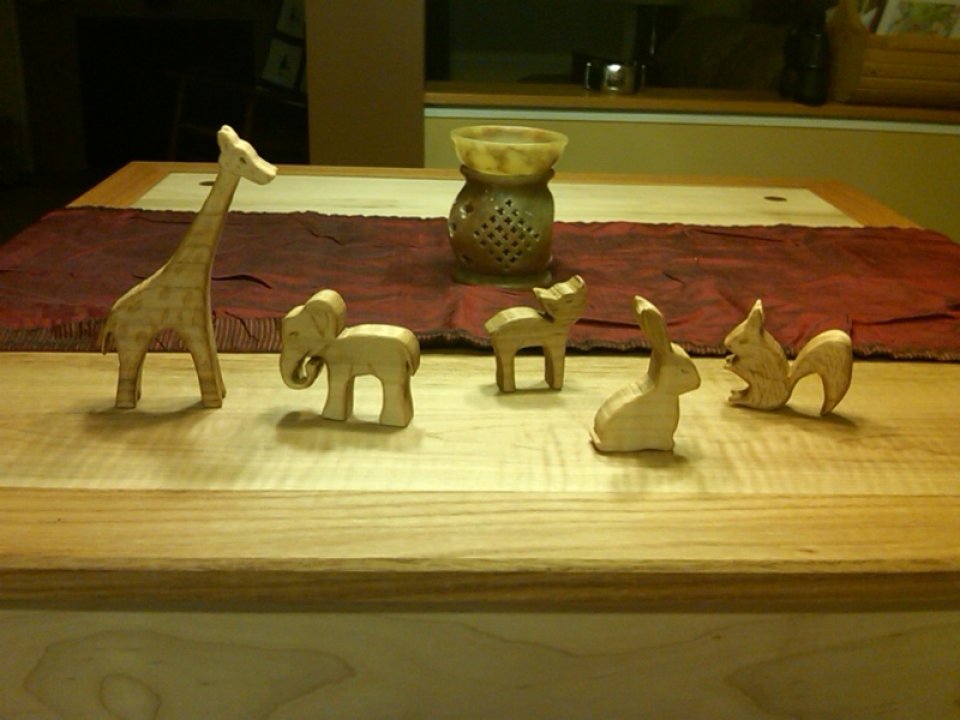
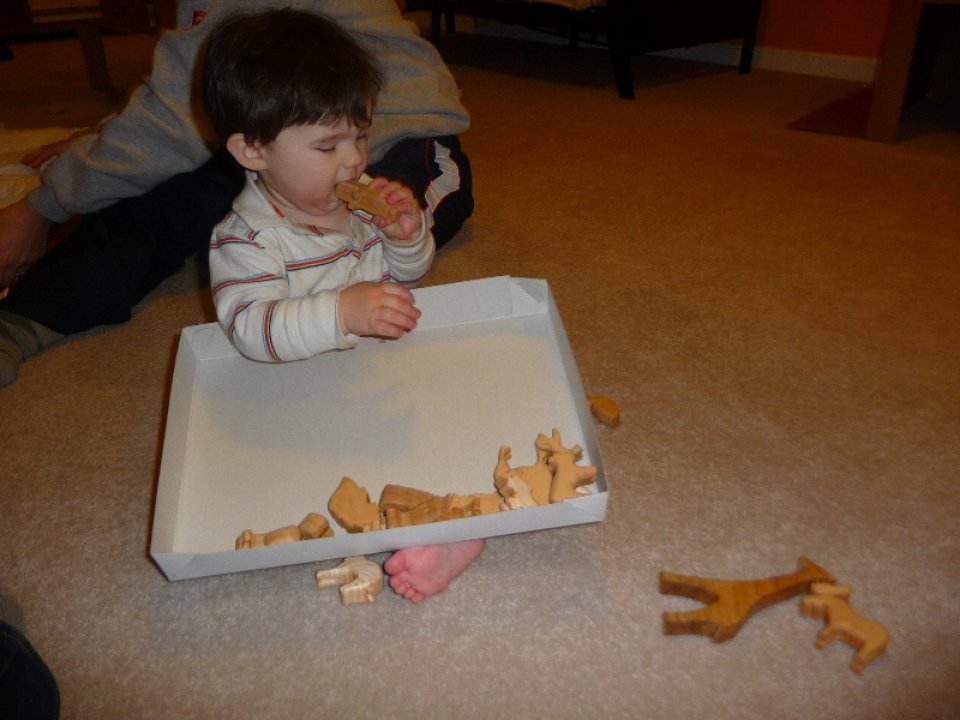
Materials: Maple, Natural Homebrew Beeswax Finish
Tools: Dremel + Carving Bit, Bandsaw
I had some leftover maple board cuttings from the ‘Maple Table’ that I built and thought it would be a great material to use for some Animals for Rowan to play with. I ended up making 20 characters which we gave him for his first christmas.
Children’s Art Table:
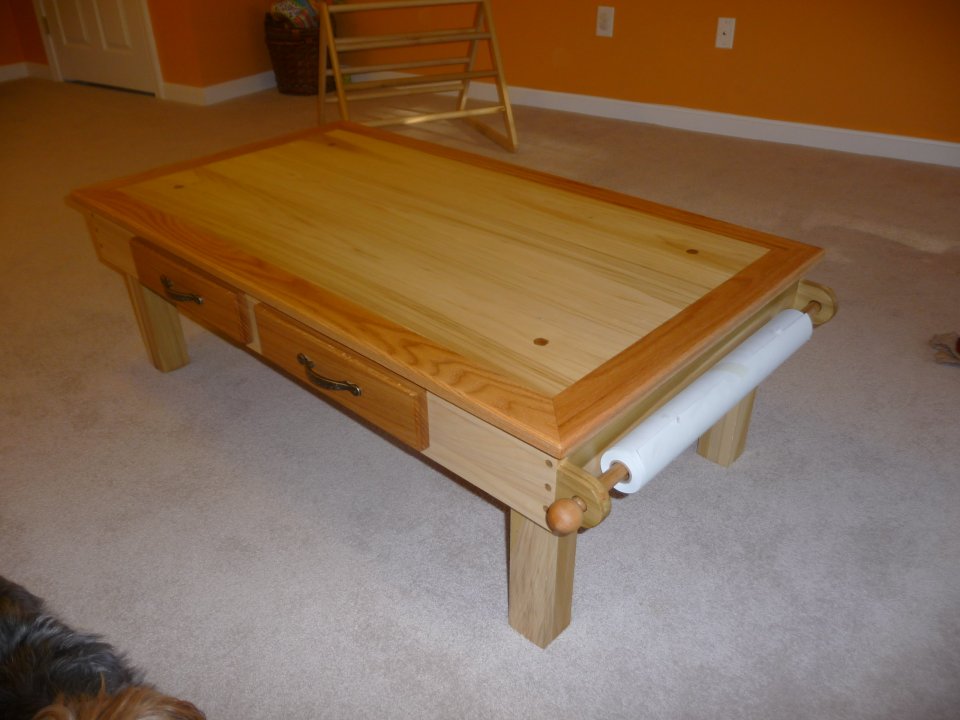
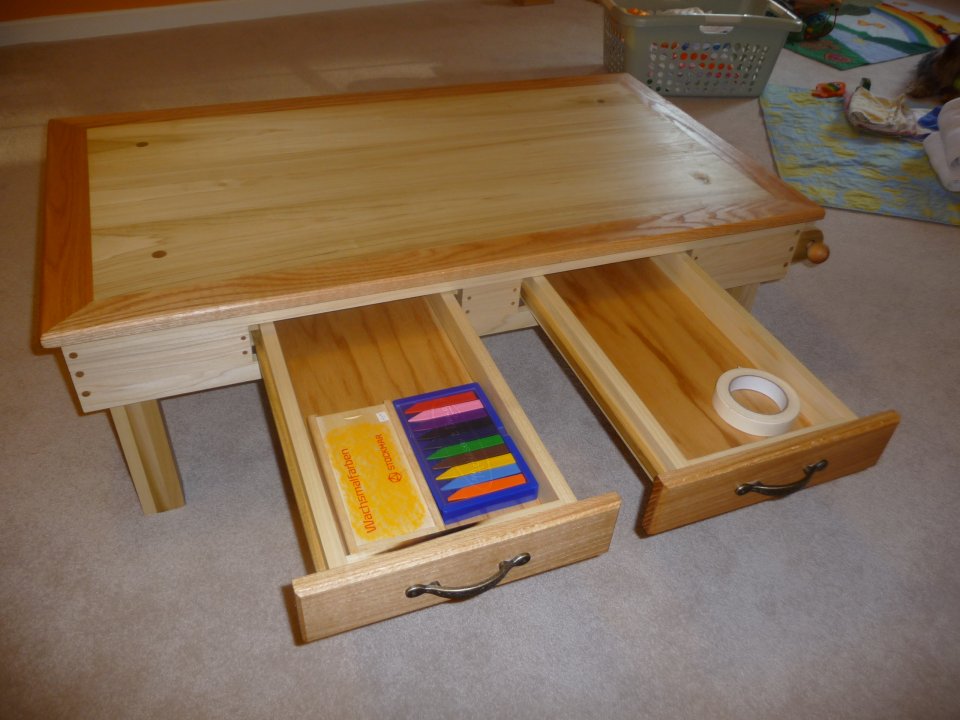
Materials: Poplar Boards, Oak Boards, Drawer Handles, Oak Balls, Oak Dowels, Brass Connector Bolts, Threaded Inserts, Glue
Tools: Miter Saw, Drill, Lots of Clamps, Speed Square, Tape Measure, Block Plane, Sandpaper + Sanding Blocks, Allen Key
We get those kids catalogs with the expensive furniture in them from time to time, and there was a table similar to this that seemed really appealing to me. Rowan loved coloring, and I thought it would be awesome to have a nice art table with a paper role built in for him. The legs can be swapped out for taller ones as he gets older, possibly using it as a writing desk when in school, etc.. He really loves the table, but mainly uses it for his plan toy cityscape right now.
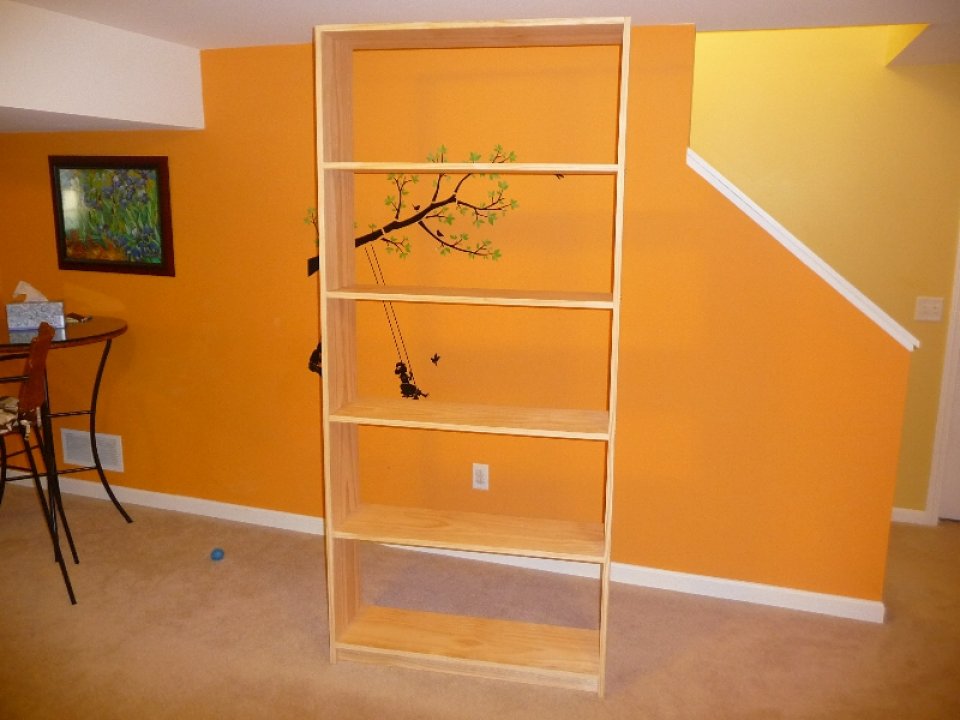
Children’s Bookcase:
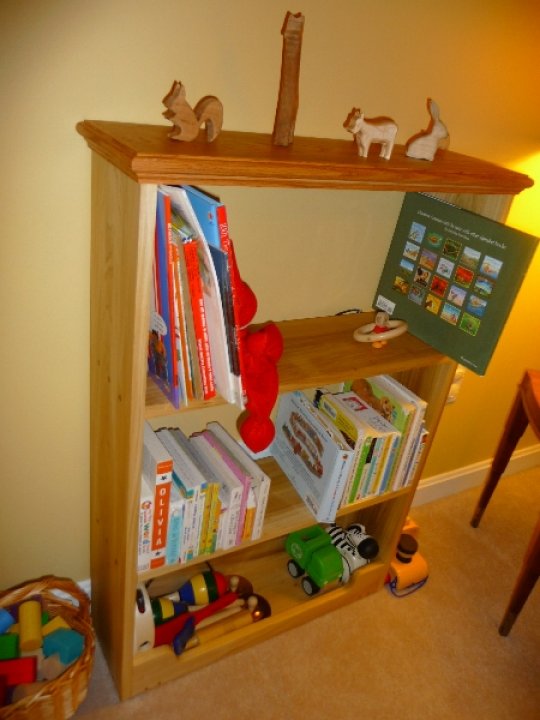
Materials: Poplar Boards, Oak Boards, Oak Pegs, Oak Molding Trim, Glue
Tools: Miter Saw, Drill, Bandsaw, Clamps, Speed Square, Tape Measure, Sandpaper + Sanding Blocks
Rowan really loves being read to, and at the time that I decided to build this bookcase we had amassed quite a number of books for him with nowhere to really put them. The bookcase was built to match the “Children’s Art Table” that I made for him.
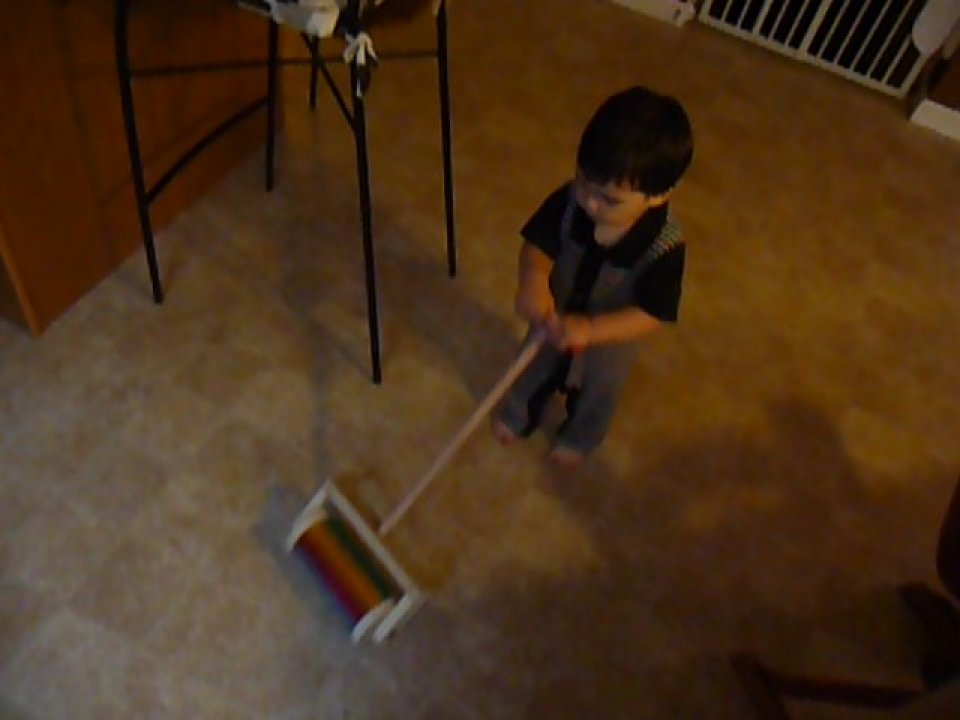
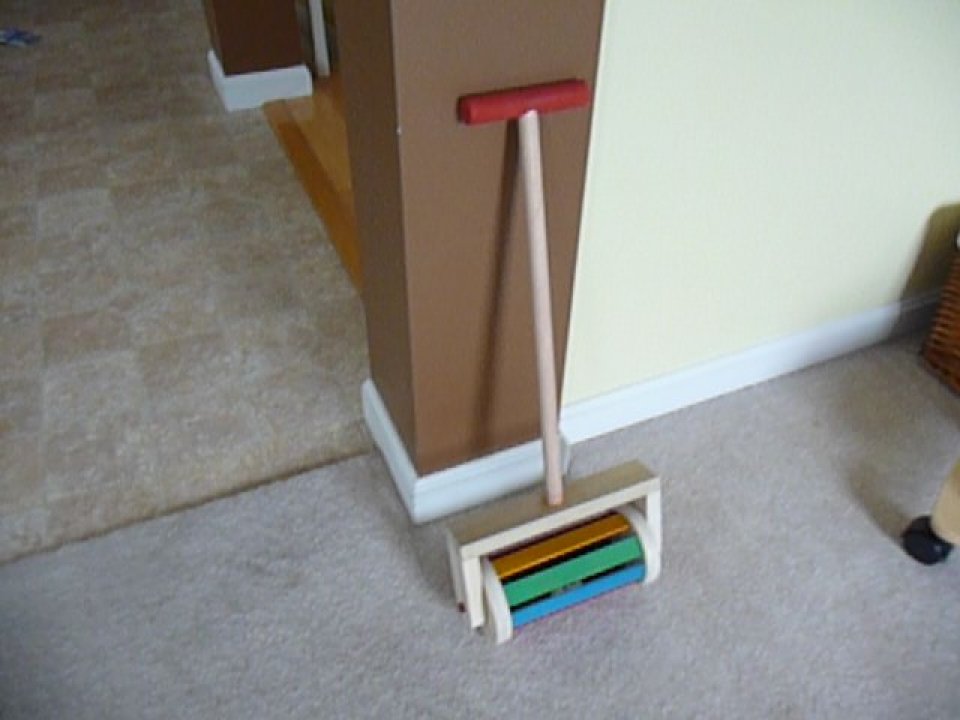
Ball Tumbler Push Toy:
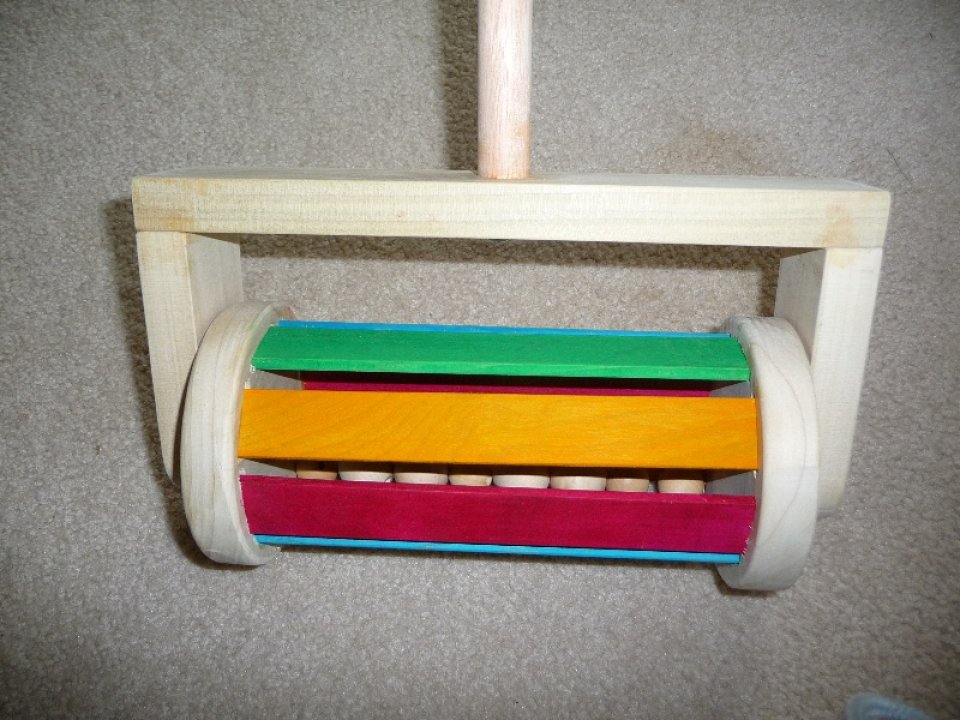
Materials: Poplar Boards, Poplar Dowel, Pine Balls, Glue, Screw, Water Colors, Polycrilic
Tools: Miter Saw, Bandsaw, Drill Press, Turning Bolt for Drill Press, Wood Rasp, Mill File, Screwdriver, Sandpaper
You see these at the kid stores ( plan toys makes one ), and one day Rowan really took interest in pushing one of them around. Since we don’t really buy him toys outside of special occasions, I thought it would be neat to try and build him one. It really turned out pretty good, and the tumbler planks really took on the vibrant colors of the water colors that were used. I ended up having to use water based Polycrilic on the colored planks as the color did tend to rub off on my hands even after dry. To make the tumbler roll really well, I cut out the rough wheels on my bandsaw, drilled holes through the centers of both wheels, fashioned a bolt that would lock the two wheels in place, and chucked the bolt up in my drill press for some light turning with a file.
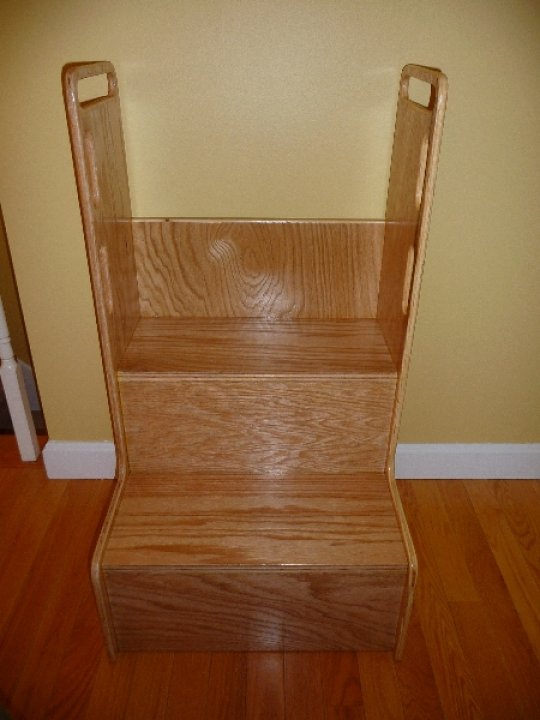
Toddler Step Up & Wash:


Materials: Oak Plywood, Glue, Polycrilic
Tools: Bandsaw, Coping Saw, Drill, Miter Saw, Sandpaper + Sanding Blocks
Rowan’s school ( daycare ) must have heard that I was doing a lot of woodworking, and asked if I could make them a step up & wash for the kids. How could I say no, his school has been so great.
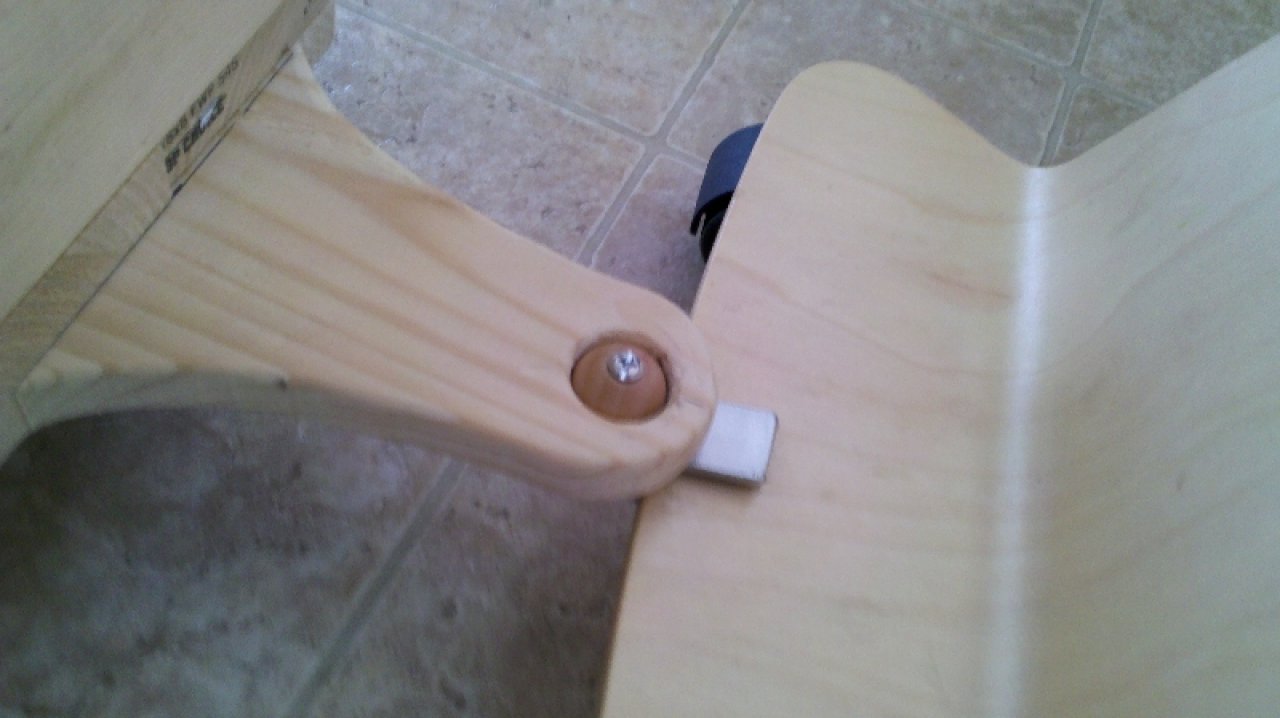
Svan Scooter Ball Hitch + Trailer:


Hitch Materials: Oak Ball, Nut & Bold, Steel Bar Stock, Oak Plywood
Trailer Materials: Wheels, Wheel Bolts, Pine Boards, Screws
Tools: Miter Saw, Drill, Screwdriver
So one day Rowan decides he wants a trailer for his scooter, and proceeds to hook the handle of his push cart under the back wheels of the scooter and attempts to drive it around. My first attempt to resolve the situation was to tie the cart to the scooter with some nylon cord, which he seemed to love. It became apparent that I just had to build him a proper trailer + hitch for his scooter. I didn’t want to drill any holes in the scooter, so I setup a compression fitting for the back which had a wood ball ( like a regular hitch ) to interface with the trailer. The trailer was very crudely designed out of 2x4s and pine boards, but it got the job done. I did end up dropping the compression fitting as over time it would slide off. It was easy to simply drill a whole in the back of the scooter and use the existing ball + bolt there.
Children’s Sensory Table:
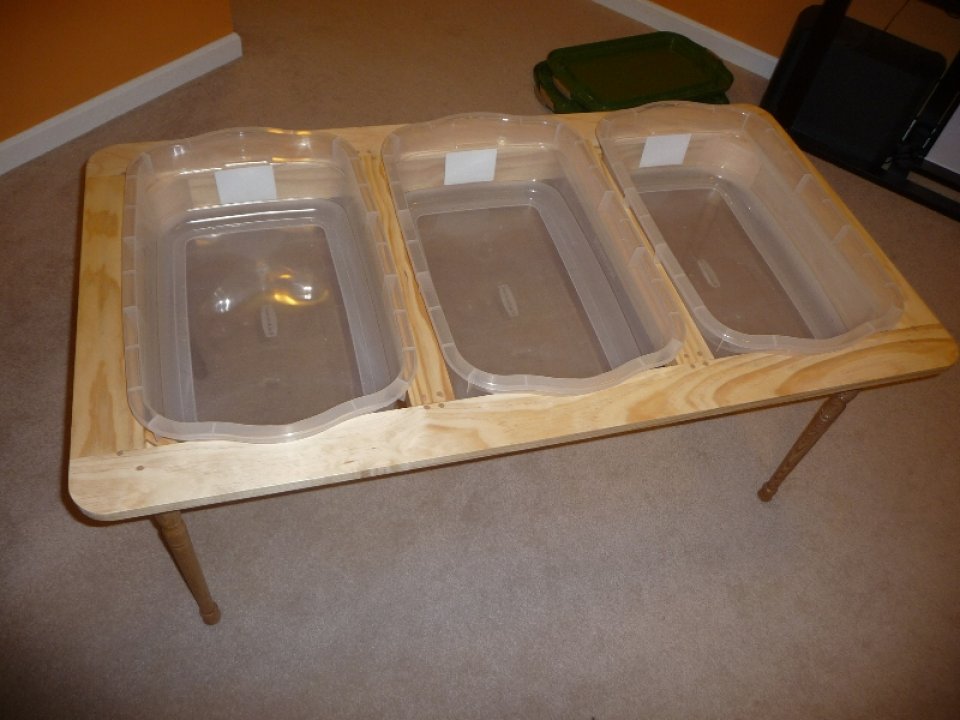
Materials: Pine Boards, Pine Legs, Oak Pegs, Rubbermaid Contains + Lids, Glue, Polycrilic
Tools: Miter Saw, Drill, Bandsaw, Random Orbital Sander
Rowan really loved the sensory table at his school, so I thought it would make a great Christmas gift this past year. There are three bins, lids not shown in the photo. We have put rice, oobleck, water, soapy water, trucks, legos, etc.. in the table. I also had a small fish tank bubbler which was a lot of fun with the soapy water.
Children’s Loft Bed:
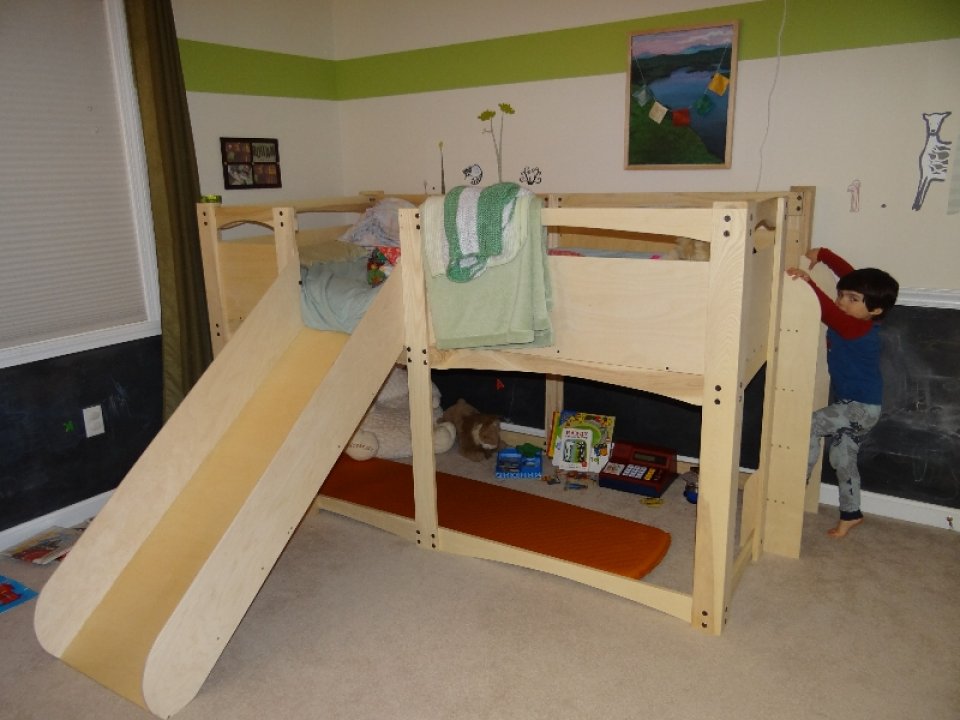
Materials: Ash Boards, Baltic Birch Plywood, Screws, Connector Bolts, Threaded Inserts, Glue
Tools: Miter Saw, Bandsaw, Speed Square, Tape Measure, Screwdriver, Allen Key, PVC+String for arch template, Drill, Drill Press, Clamps, Jigsaw, Random Orbital Sander
With a new baby on the way and in need of a crib, it was time for Rowan to give up his toddler bed and get a new big boy bed. I found a beautiful bed by a company out of Maine, though very cost prohibitive. I decided to build my own version of the bed, which turned out quite nice. The bed features a nice slide, and space under the bed for play & storage. I used a piece of 1/2″ pvc conduit and string to form a template for the symmetrical arch on all the cross sections. I also fashioned a jig for my drill press that made drilling all the cross section holes much faster. Once one arch piece was made it was basically busy work building the same piece over and over again using the first as a template. My wife ended up getting me a really nice jigsaw for Christmas which I ended up using to cut out all the arches & plywood ( my bandsaw is a fairly cheap 10″ craftsman ). The whole bed ended up using 72 connector bolts, wow!
Furniture:
Maple Table:

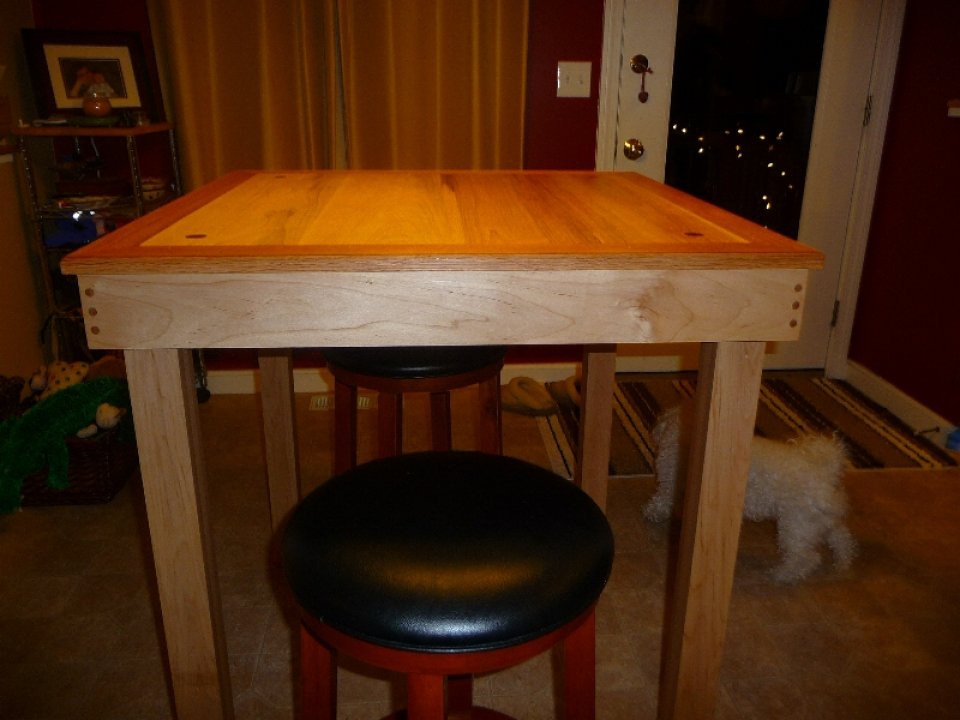
Materials: Maple Boards, Oak Boards, Oak Dowels, Connector Bolts, Threaded Inserts, Glue
Tools: Miter Saw, Lots of Clamps, Drill, Random Orbital Sander, Block Plane, Allen Key, Speed Square, Tape Measure
My wife loved the “Children’s Art Table” that I made for Rowan so much that she wanted me to make a new table for our breakfast nook that was bar height to match our kitchen island ( our kitchen is completely open ). The legs were made by gluing up 3 – 1×3 maple boards per leg. Oak dowels and glue was used to join everything, except for the legs which are connected with connector bolts to threaded inserts in the table top. The table has held up quite well, however it has been moved around quite a bit since we do not have any matching chairs for it ( I said I would make some but never got it it, at least not yet … ).
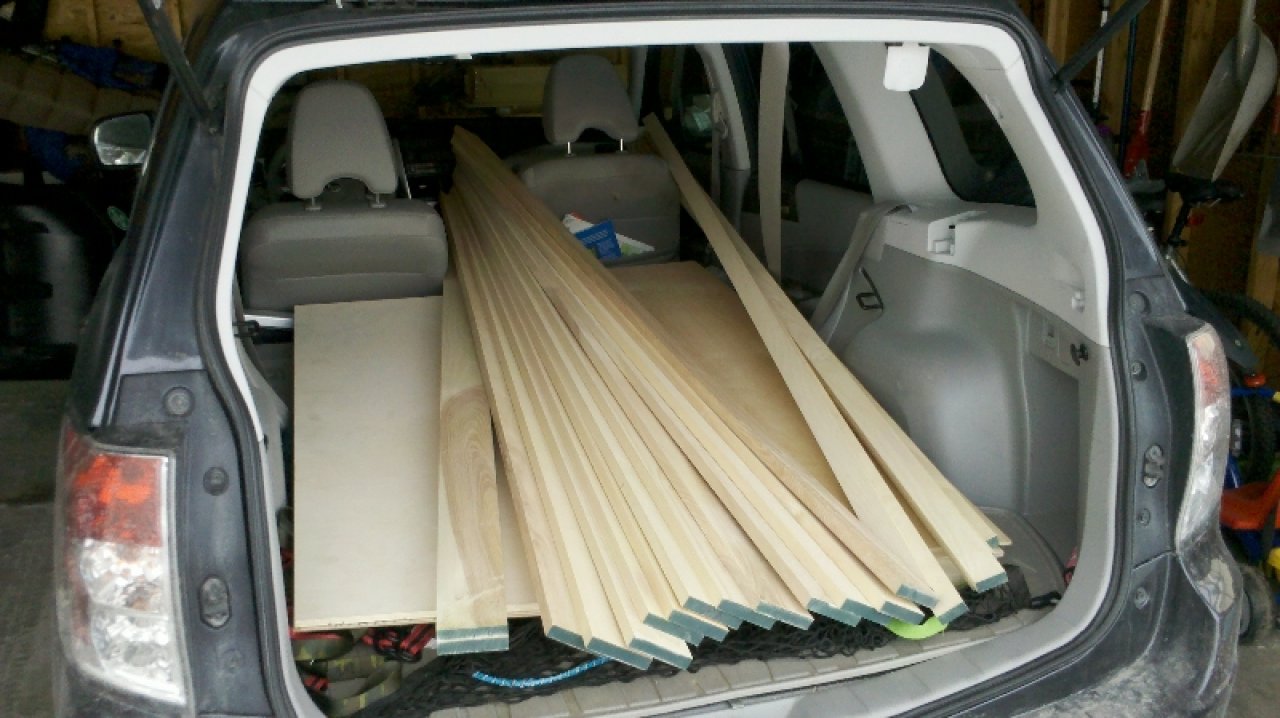
Pine Bookcase:
Materials: Pine Boards, Connector Bolts, Threaded Inserts, Glue, Pine Molding
Tools: Jigsaw, Miter Saw, Drill Press, Random Orbital Sander, Speed Square, Tape Measure
My mom needed some bookcases for all of her books, which were still all boxed up since her last move. I decided to try and help out by making some pine bookcases with good capacity, low cost, and still looked nice. I also needed to be able to load it into my subaru forester and drive it 5 hours to it’s new home, so I designed it with that in mind. The photos I have do not show the molding at the top of the bookcase, but the finished bookcase has wrap around molding at the top which really jazzes it up quite a bit. Overall the bookcase was a success, but I haven’t had time to build anymore for my mom, though she was asking for many many more ![]()
Outdoor Projects:
Cedar + Copper Fountain:
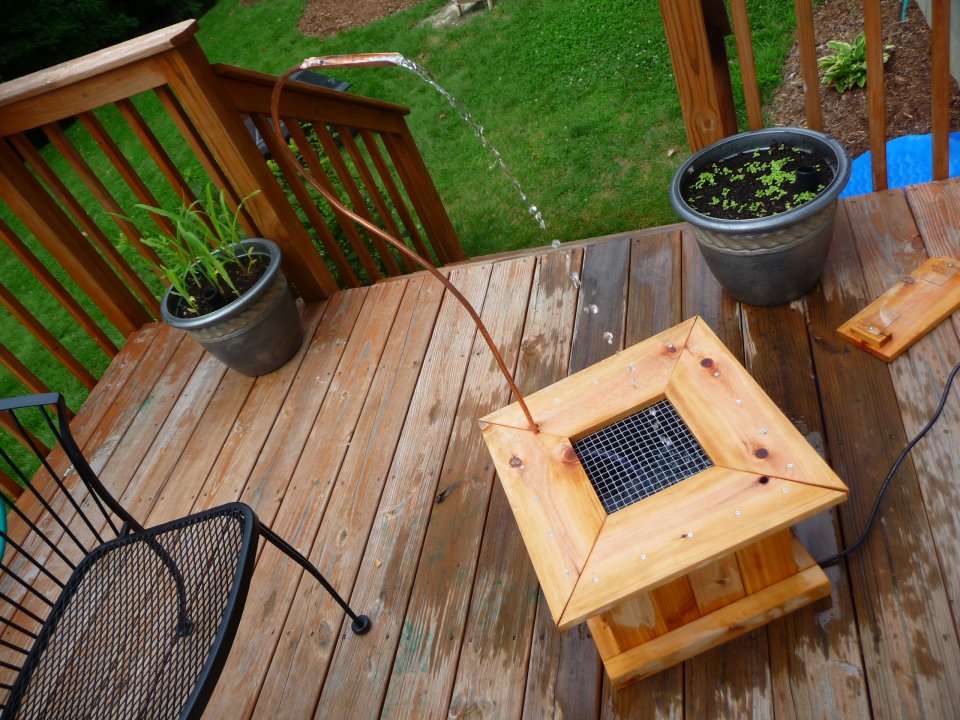
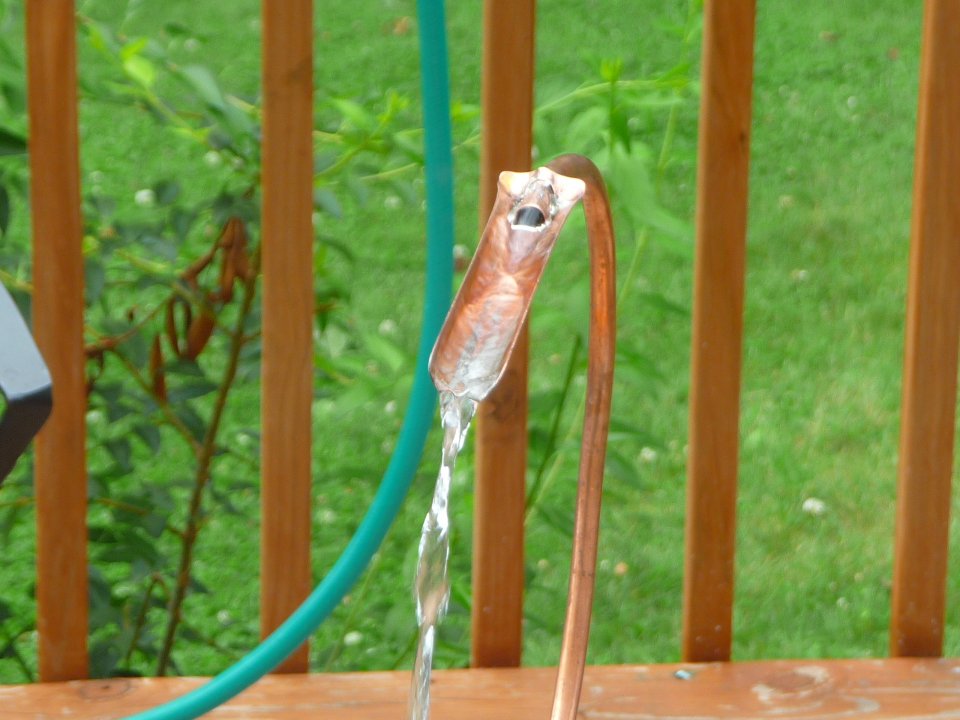
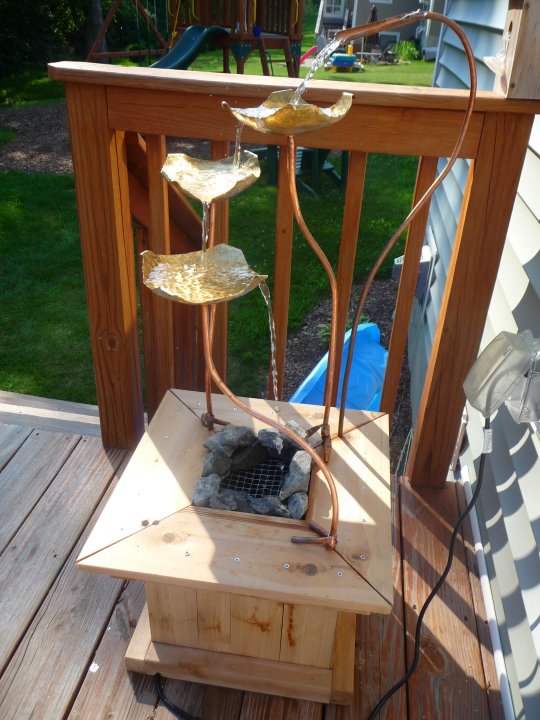
Materials: Cedar Boards, 5gal Bucket, Copper Pipe, Copper Sheet, Solder / Flux, Small Pond Water Pump, Vinyl Tubing, Compression Fitting
Tools: Miter Saw, Screwdriver, Drill, Ball Peen Hammer, Mapp Gas Torch, Speed Square, Tape Measure
There is nothing like opening your windows on a summer’s night and hearing the sound of running water. Since we don’t live near any natural water source that can be heard, I decided to build a fountain for the deck. The fountain worked out quite well though the initial design had just one pour spout that dropped the water into the bucket below. It is fairly windy here and the water would splash out quite a bit, which required me to fill the fountain quite frequently. I ended up hammering out some copper dishes from sheet stock, and arranged them as a cascase into the pool below.
Garden Mancala Game:
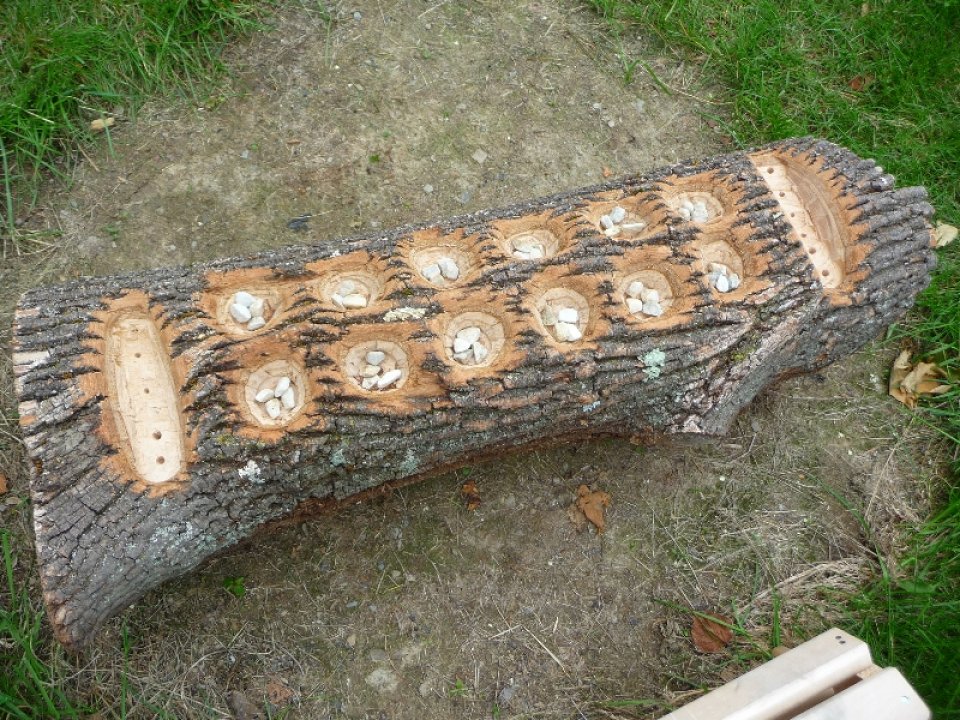
Materials: Wood Log, Small Stones or Glass Gems
Tools: Drill, Spade Bits, Tape Measure
My wife brought home a couple of big logs one day, I think to be used for stools in the garden, but I thought it would be cool to make a natural looking game for the garden. I decided to make a Mancala game, and it turned out pretty good. The kids eventually made short work of the playing stones, but it was definitely a fun project.
Chicken Coop:

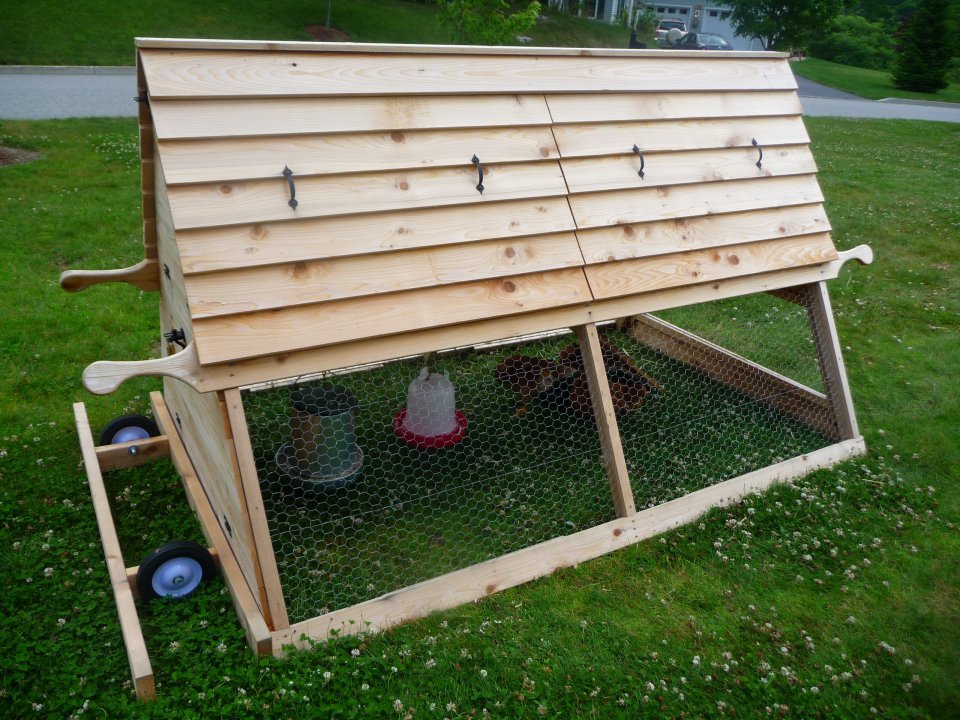
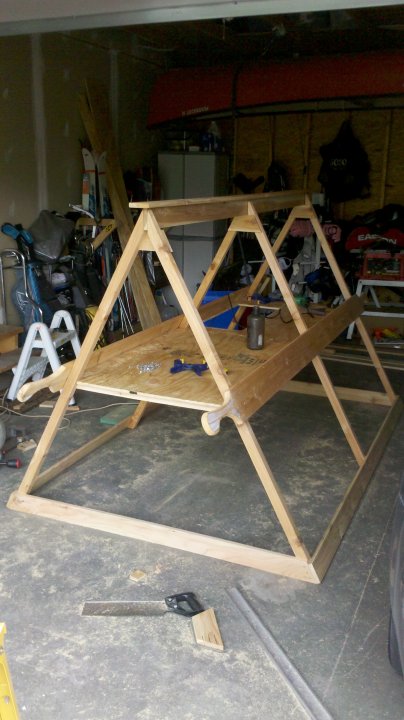
Materials: Western Cedar Boards, Screws, Metal Handles, Oak Balls, Wire, Small Pulley, Small Wheels, Wheel Bolts, Gate Latches, Chain, S Hooks, Chicken Wire / Mesh, Plywood, Door Hinges
Tools: Miter Saw, Speed Square, Screwdriver, Tape Measure, Jigsaw, Circular Saw, Drill, Sandpaper + Sanding Blocks
So in 2011 we finally decided to get chickens. We wanted the very best / freshest of eggs for the egg related dishes we indulged in. Also, there is nothing like knowing where your eggs come from, that the chickens are being treated well ( they are like pets to us ), and it has been a very good learning opportunity for the kiddos. Made of western cedar, it is an A-Frame chicken tractor style coop. The design was based on photos of similar coops that I found online. This has been a fairly safe coop at night since the top area is closed off when the ramp is pulled up. I ended up adding kick under wheels to the coop since it was impossible to move the tractor around the yard by myself, and it got the point where the girls needed to be moved at least twice a day or they would ruin the yard. For the winter I also ended up putting tuftex clear plastic panels on the bottom mesh areas, and updated the mesh lower door to have an Arcylic window with a flap door and curtains. It held up quite well this past winter.
Cedar Arbor:
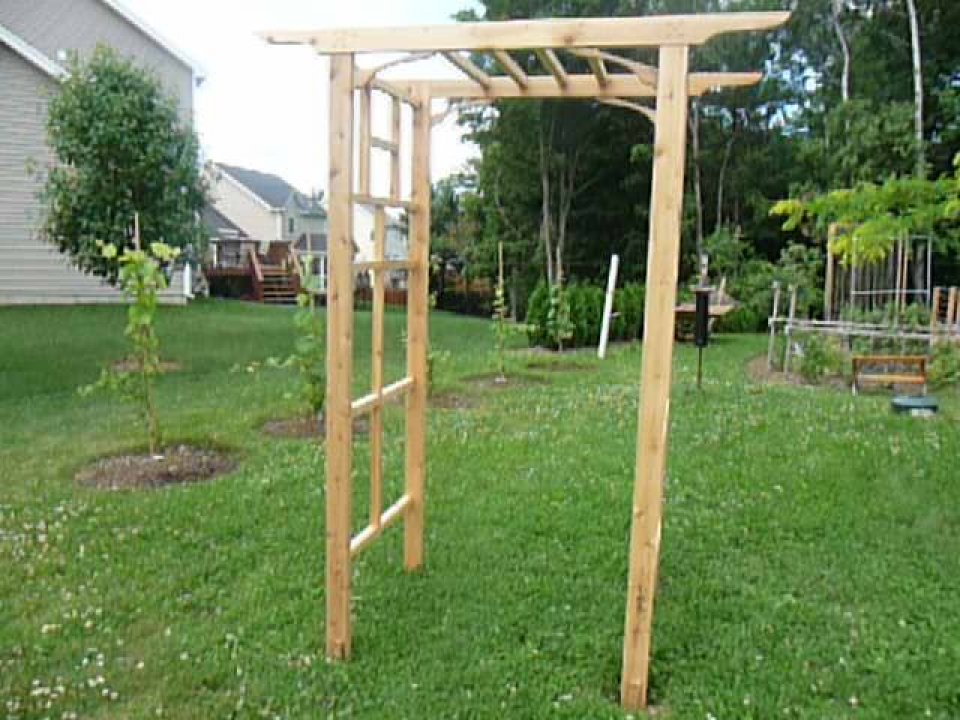
Materials: Cedar Boards, Screws
Tools: Miter Saw, Jigsaw, Screwdriver, Speed Square, Tape Measure
We have wanted to make the side yard / garden area a bit more private and building an arbor gate seemed like a good starting point. The design was from one of those black and decker ‘home improvement’ books. At some point we will have low hedges from the house to the gate, and then wrapping around the grape vines to the arborvitae privacy wall. This year I also planted some nice flowering vines at the 4 corners, hopefully they will grow up and over the arbor over the next few years.
Garage Accessories:
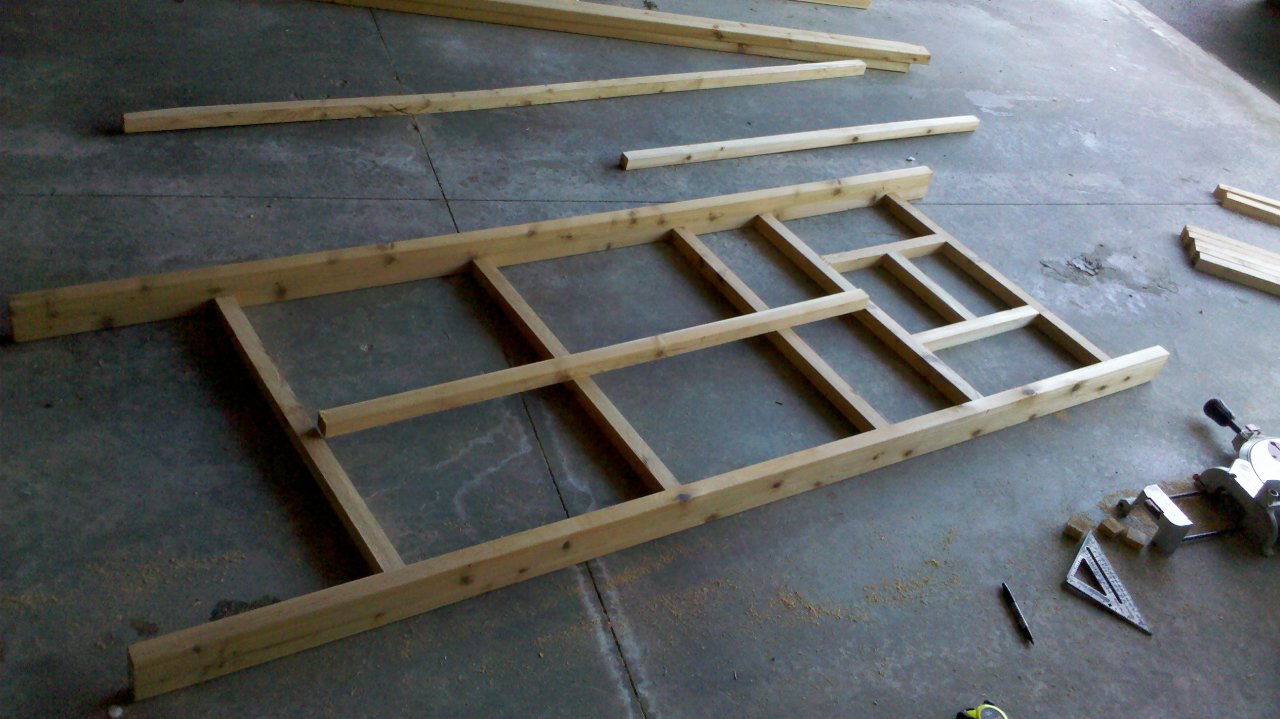
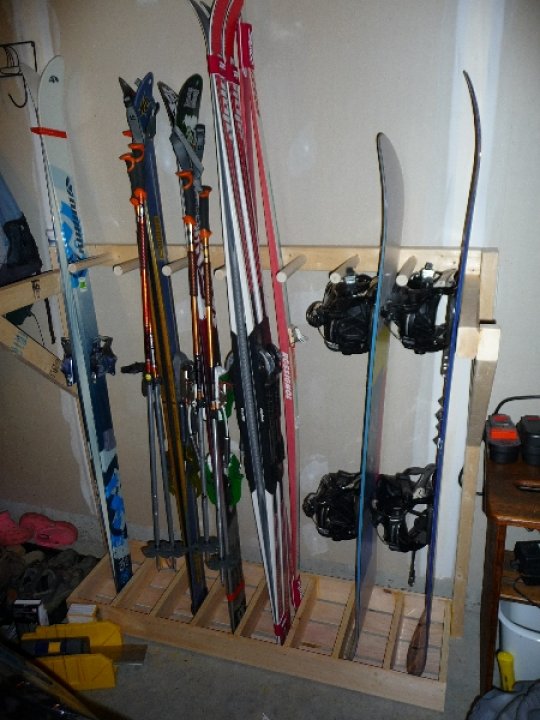
Ski & Snowboard Holder / Rack:
Materials: Pine Boards, Screws, Pine Dowels
Tools: Miter Saw, Screwdriver, Speed Square, Tape Measure
When we first moved to our house we were just into snowboarding, and I had those hanging on the back wall of our garage. The next year my wife got me into cross country skiing, and those ended up being stood up in one corner of the garage. The next year my wife was introduced to telemark skiing by one of her close friends, and she was extremely motivated to get me involved as well ( I was a die hard snowboarder at the time ). That being said I quickly took interest in telemark skiing, and that meant another two sets of skis propped up in the garage. Our house backs up to an ~800ft hill which has some nice steeps for light backcountry skiing. With my new passion for telemark, backcountry skis seemed like a natural and needed progression, which meant even more gear in the garage, and with no proper place to put it. I finally threw together this ski and snowboard holder which has been an amazing space saver. We can fit all of our gear in this one holder ( Rowan now has his own alpine skiis as well ). It accommodates both skiis and snowboards.
Cheers,
Morgan